this is a page for

Category: recipes

Peach Margarita Cupcakes

Cinco de Mayo is this weekend! Who’s ready for all the nachos, tacos, and margaritas?? Well, how about a twist on the classic cocktail – a peach margarita cupcake. Dessert and tequila all in one? Sign me up! You’ll love this fun, festive and easy Cinco de Mayo dessert!

This peach margarita cupcake recipe calls for peach extract, which can sometimes be tricky to find. I order mine online here! If you want to make these this weekend, you can always omit the extract, and just use some extra vanilla extract instead for a classic margarita taste. Then serve with fresh peach slices on top. Perfect solution!

Makes 12 standard cupcakes

Cupcake Ingredients: 

1 cup all-purpose flour
1 1/4 teaspoons baking powder
1/4 teaspoon salt
1/2 cup butter, softened
1 cup granulated sugar
1 egg plus 1 egg yolk
1 teaspoon peach extract
1/2 teaspoon vanilla extract
1/3 cup full-fat vanilla yogurt (greek or regular is fine)
1/4 cup buttermilk
2 tablespoons tequila
Juice of 1 lime
Zest of 2 limes

Tequila Lime Buttercream Ingredients: 

1 cups butter, softened
3 cups powdered sugar
Juice and zest of one lime
1 tablespoon tequila
1/2 teaspoon vanilla extract
 
Cupcake Directions: 

Preheat the oven to 350 degrees, and line a muffin tin with cupcake liners. Whisk together the dry ingredients, flour through salt.

In the bowl of your stand mixer fitted with the paddle attachment, beat the butter until light and fluffy. Mix in the sugar until combined. Add in the eggs, vanilla, yogurt, buttermilk and tequila and mix on low until all ingredients are incorporated. Then add the flour mixture, mixing on low until just combined, scraping down the sides of the bowl as necessary. Mix in the lime zest and juice.

Spoon the batter into the lined muffin tin, filling the liners evenly to about 1/2-2/3 full. Bake 13-16 minutes or until a toothpick comes out with moist crumbs. Allow to cool before removing from liners.

Just before frosting, brush each cupcake with tequila!  

Tequila Lime Buttercream Directions:

In the bowl of your stand mixer fitted with the paddle attachment, beat the butter on high speed until light and fluffy. Add powdered sugar one cup at a time, starting your mixer on low and increasing to high with each addition. Add the lime zest, juice, tequila and vanilla extract, mixing on high speed for about 3-4 minutes. Add additional cup of powdered sugar if necessary. Taste! If you’d like the frosting to taste even more like lime, add additional zest!

Sprinkle sea salt on the top of each frosted cupcake, and garnish with sprinkles and a lime wedge. I used these sprinkles from Sweets and Treats!

http://www.thiscelebratedlife.com/search/label/recipes

Earl Grey Madeleines

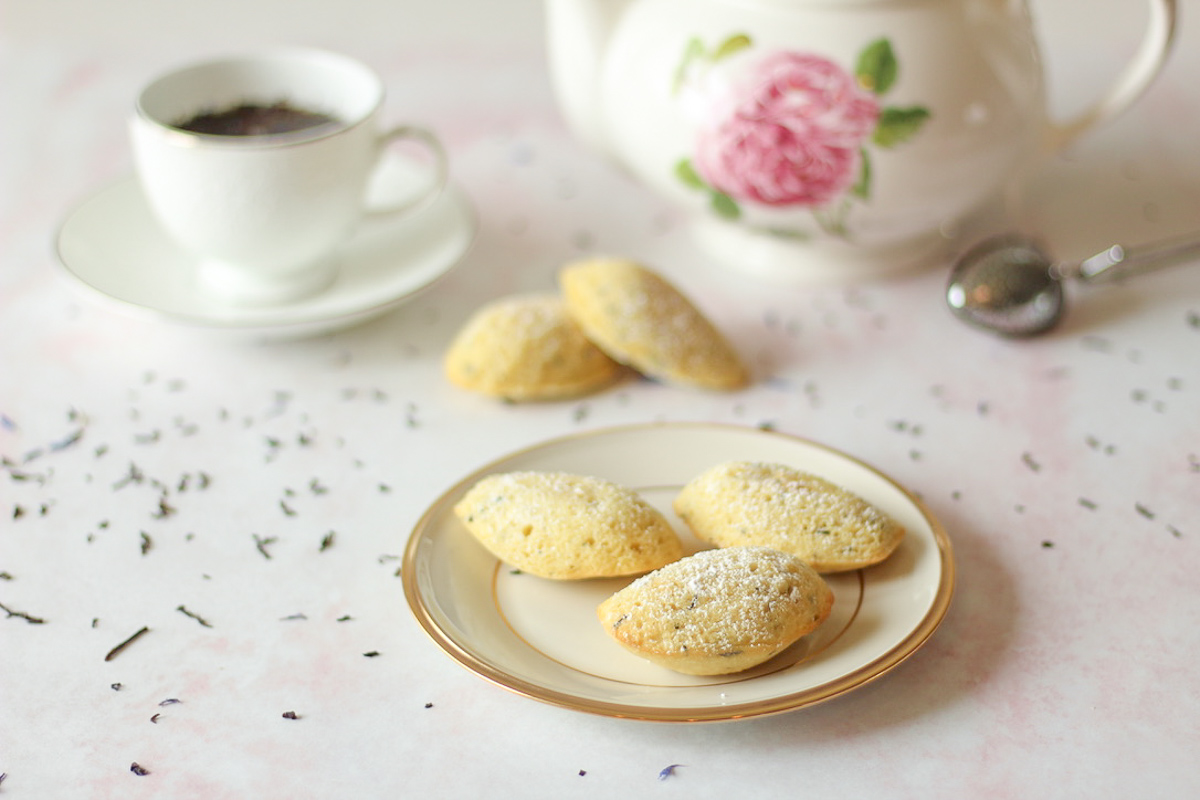
Light, soft and bursting with flavor, these earl grey madeleines are a fun and easy dessert that everyone will enjoy. With a hint of earl grey and sprinkling of fresh lemon, these are a perfect cookie to serve alongside tea or coffee.

Somewhere between a cake and a cookie, madeleines are a light, pillowy and almost feminine cookie that are perfect for teas, brunches, or a special dessert! While they seem fancy, madeleines are actually incredibly easy to make (and even easier to eat!). 

Ingredients:

1 cup all-purpose flour
1 teaspoon baking powder
1/4 teaspoon salt
3 eggs
1/2 cup granulated sugar
1 lemon, zested
6 tablespoons butter, melted
1 tablespoon earl grey tea leaves
1 tablespoon powdered sugar (optional)

Directions:

Whisk together dry ingredients, flour through salt. In a medium mixing bowl, beat eggs and sugar together with a hand mixer until light, about 5 minutes.  Add zest. Add the dry ingredients in two batches, mixing on low speed. Add the butter in two batches, mixing on the lowest speed until just combined. Gently fold in earl grey tea leaves.

Press plastic wrap to the surface of the batter, and then cover the top of the bowl again in plastic wrap. Refrigerate overnight – this is important so your madeleines develop that characteristic hump.

Preheat the oven to 350 F.  Grease madeleine pan with baking spray (I like this coconut oil one). Fill each well with 1 tablespoon batter. Don’t worry about spreading the batter throughout the well, it will do that on its own when it bakes. Bake in the preheated oven 7-8 minutes. Allow to cool in the pan for about 5 minutes, and then remove from pan. Dust with powdered sugar just before serving.

http://www.thiscelebratedlife.com/search/label/recipes

Lemon Poppy Seed Muffins

Lemon poppy seed muffins are one of my favorite muffins of all time. I’m always super tempted to grab one when I see them at bakeries! So I was excited to create a bakery-style poppy seed lemon muffin recipe that we can all make at home! With light flavor, just a hint of bright citrus and a fluffy almost cake-like consistency, these easy muffins are pure perfection. So you’ve got to try them, ok?


By the way! If you’re looking for a new muffin tin, by the way, this one is my favorite! I use it for all my muffins and cupcakes and I’m obsessed.


easy lemon poppy seed muffins

Cookies and Cream Cake

If you’re a fan of cookies and cream ice cream, you have got to try this cookies and cream cake! Rich, dense and full of cookie goodness, this cake is what dreams are cookie lovers’ dreams are made of! The cake is made with cream cheese, giving that characteristic vanilla cream taste, cookies baked into the cake and pureed into the frosting, and covered with chocolate ganache. Every bite will send your taste buds into a tizzy!

I love fun and unique cake flavors. You can obviously tell that by looking through all of my cake recipes here! It’s just so much fun to serve guests a cake they can’t find in the average bakery. What’s especially great about this cake recipe is that it’s really easy! An easy recipe that will impress guests? That’s what I’m all about!

Cake Ingredients: 

2 cups all-purpose flour (I like Bob’s Red Mill)
2 1/2 teaspoons baking powder
1/2 teaspoon salt
1 cup butter, softened (I used Tillamook)
1 3/4 cups granulated sugar
3 eggs
2 1/2 teaspoons vanilla extract
8 oz cream cheese (I used Philadelphia)
1/4 cup buttermilk
2 cups oreos, roughly chopped

Frosting Ingredients: 

2 cups butter, softened
5-6 cups powdered sugar
2 teaspoons vanilla extract
1 cup finely crushed oreos (I crushed mine in the food processor)

Ganache Ingredients: 

1 cup semi-sweet chocolate chips
1/3 cup heavy cream

Directions: 

Preheat the oven to 350 degrees F, and grease and line three 6″ cake pans. Whisk together the dry ingredients, flour through salt in a medium bowl and set aside.

In the bowl of a stand mixer fitted with the paddle attachment, beat the butter until light and fluffy. Add the sugar, and beat until well combined. Add the eggs and vanilla and mix until combined, scraping down the sides of the mixing bowl as needed. Add the cream cheese and buttermilk, mixing until all ingredients have come together. The batter may look piecey at this stage, which is ok!

Add the dry ingredients, mixing on low speed until just combined. Stir in the oreos by hand with a spatula, making sure they’re evenly distributed within the batter. Spoon the batter into the prepared cake pans, and bake about 38-42 minutes, or until a toothpick comes out with moist crumbs.

For the frosting: In the bowl of a stand mixer fitted with the paddle attachment, beat the butter until light and fluffy. Add the powdered sugar one cup at a time, and then add the vanilla extract. Add the finely crushed oreos, starting the mixer on low and increasing the speed to high for about 3 minutes. If the frosting is too wet, add another cup of powdered sugar. If it’s too dry, add a tablespoon of heavy cream.

For the ganache: Heat the chocolate chips and heavy cream in a microwave-safe bowl for about a minute, or until the chocolate chips are completely melted. Allow to cool slightly, and then drizzle down the sides of the cake, finishing by covering the top of the cake as well. Let set in the fridge until hardened before adding any frosting decorations on top.

http://www.thiscelebratedlife.com/search/label/recipes

Cherry Orange Traditional Hot Cross Buns

There are very few things that beat the taste of warm, traditional hot cross buns, especially on Easter morning!  These are all the delicious spices and flavors of traditional hot cross buns flavors, with a few surprises! Dried cherries replace raisins, orange zest brightens up the spices, and orange icing completes these for a flavor explosion. The perfect treat for your Easter brunch, served alongside mimosas and coffee, don’t you think? (The answer: Yes, absolutely!)

traditional hot cross buns
 
We love making these sweet, spiced rolls for a special Easter morning treat, and they’re honestly just as good as an Easter dessert with a cup of coffee! Or after-church nibble. Or snack during the egg hunt. Ok basically these are perfect all day long! (Psst! For more Easter recipes, scroll to the bottom of the post!)


easy hot cross buns recipe

traditional hot cross buns


Let’s talk about a few of the flavors in these hot cross buns for a minute. The signature flavor of hot cross buns is the spiced bread. Cinnamon, cloves and nutmeg play a star roll here, especially paired with brandy soaked dried cherries. And add in the fresh orange for the icing? Heck to the yes!


cherry orange hot cross buns recipe

traditional hot cross buns

Cherry Orange Traditional Hot Cross Buns Tricks:

One of my favorite baking tricks is soaking dried fruit, usually in brandy, rum or bourbon (like in my Simple Bourbon Apple Crisp). Since the cherries in these hot cross buns are soaked overnight in brandy, they are bursting with super delicious flavor! Please note: all the alcohol is completely cooked out of these rolls.


Yeasty breads always have a few extra steps, but that doesn’t mean they’re more difficult. These traditional hot cross buns are actually incredibly easy to make! While the bread is rising, you can do other things around the house, run errands – whatever! And when you come home the house will smell like delicious homemade bread. Believe me – soooooo yummy!!


Print
clock clock iconcutlery cutlery iconflag flag iconfolder folder iconinstagram instagram iconpinterest pinterest iconfacebook facebook iconprint print iconsquares squares iconheart heart iconheart solid heart solid icon

Cherry Orange Hot Cross Buns

5 Stars 4 Stars 3 Stars 2 Stars 1 Star No reviews
  • Author: Kirsten Bell
  • Prep Time: 2 Hours
  • Cook Time: 25 Minutes
  • Total Time: 2 Hours and 25 Minutes
  • Yield: 16 Rolls 1x
  • Category: Dessert
  • Method: Baking

Description

Easy and delicious cherry orange hot cross buns! All your favorite flavors of traditional hot cross buns, with some extra flavor surprises!


Ingredients

Scale

Buns Ingredients: 

1/4 cup brandy, rum or apple juice
1 cup dried cherries (double check that there are no pits)
1/3 cup packed brown sugar
1 teaspoon ground cinnamon
1/4 teaspoon ground cloves
1/4 teaspoon ground nutmeg
1 3/4 teaspoons salt
1 tablespoon baking powder
4 1/2-5 cups all-purpose flour
1 1/4 cups warm milk
1 package yeast
2 eggs, plus 1 yolk
6 tablespoons butter, melted
1/2 teaspoon vanilla extract
1 orange, zested

Icing Ingredients: 

1 cup powdered sugar
4 teaspoons fresh orange juice
1/2 teaspoon vanilla extract


Instructions

Combine the dried cherries and brandy in a small bowl, and cover with plastic wrap. Allow the cherries to soak 12 hours, or preferably overnight.

In a medium mixing bowl, whisk together the dry ingredients, brown sugar through flour, and set aside. In your stand mixer fitted with the paddle attachment, dissolve the yeast into the warm milk. Cover with plastic wrap and let sit 3-5 minutes or until it starts to foam. Add the eggs (reserving the one extra yolk), butter and extract, mixing until combined. Add the flour mixture in three batches, mixing until just combined each time. Stir in the cherries and orange zest.

The dough should be soft and a little sticky, but not so sticky that it’s sticking to the sides of the stand mixer bowl. Add extra flour, a tablespoon at a time if this is the case. If the dough can be formed into a ball and doesn’t stick to your hands, it’s done.

Knead the dough lightly, either with your hands on a floured surface, or in your stand mixer fitted with the dough hook on medium speed for about 2 minutes.

Grease a large mixing bowl liberally with melted butter. Set the ball of dough into the bowl, turning once so the top is also greased. Cover with plastic wrap, and allow the dough to rise in a warm place for 1 hour or until doubled in size. I always turn my oven on to the lowest temperature (for my oven that’s 170 F), and once it’s preheated I turn it off. Then I let the dough sit in the warmed (but off!) oven.

When the dough has risen, punch it down to release any air bubbles that have formed. Grease two baking dishes. Divide the dough into 14-16 balls, pinching the bottoms so they stay moist while baking. Cover, and let rise again for 30-45 minutes or until doubled in size.

Now for baking! Preheat the oven to 350 F. Combine the extra egg yolk with a teaspoon of water. With a pastry brush, brush the rolls with the egg wash. Then bake at 350 for 20-25 minutes, or until the rolls are golden brown.

While the rolls cool, prepare the icing. Combine the powdered sugar, vanilla extract and orange juice in a small bowl, whisking with a fork until smooth. If it’s too thick, add more orange juice a teaspoon at a time. Transfer to a pastry bag (no need for a tip), and pipe the icing in a cross over each cooled roll. Serve immediately!

Cover leftover rolls tightly, and store on the counter for 1-2 days, or in the refrigerator for up to a week.


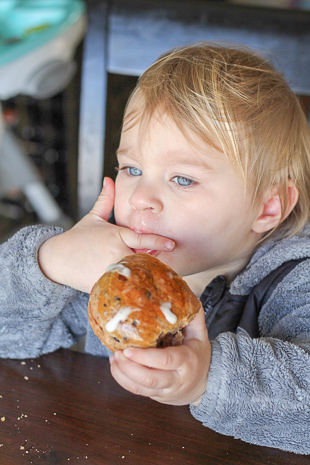
My favorite little taste tester approves!


Want More Easter Inspiration? Check out These Recipes:

This Celebrated Life