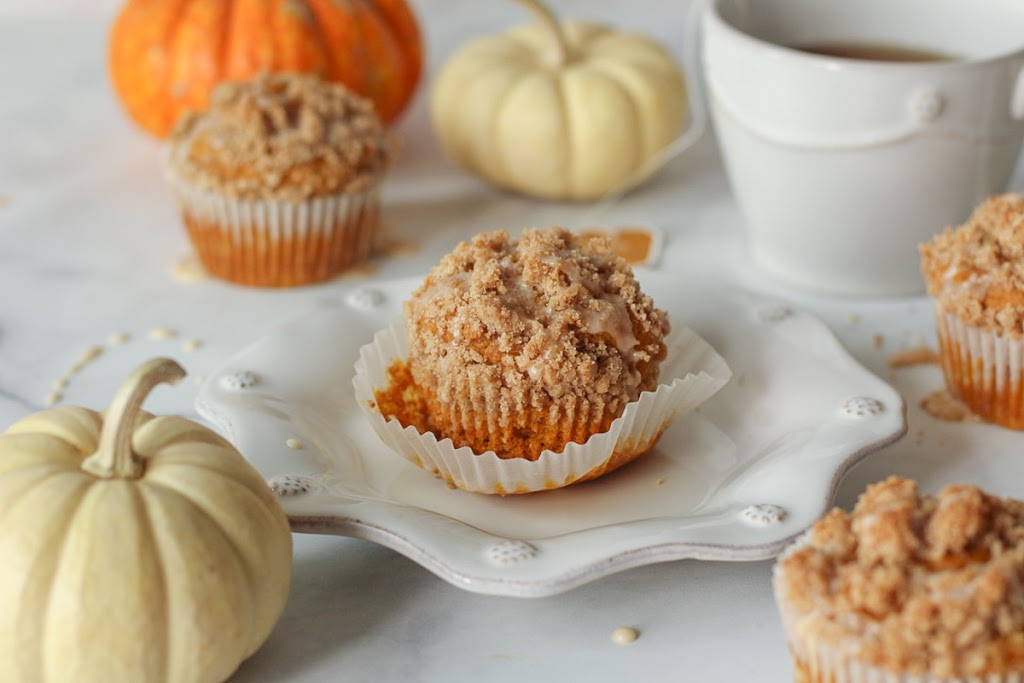
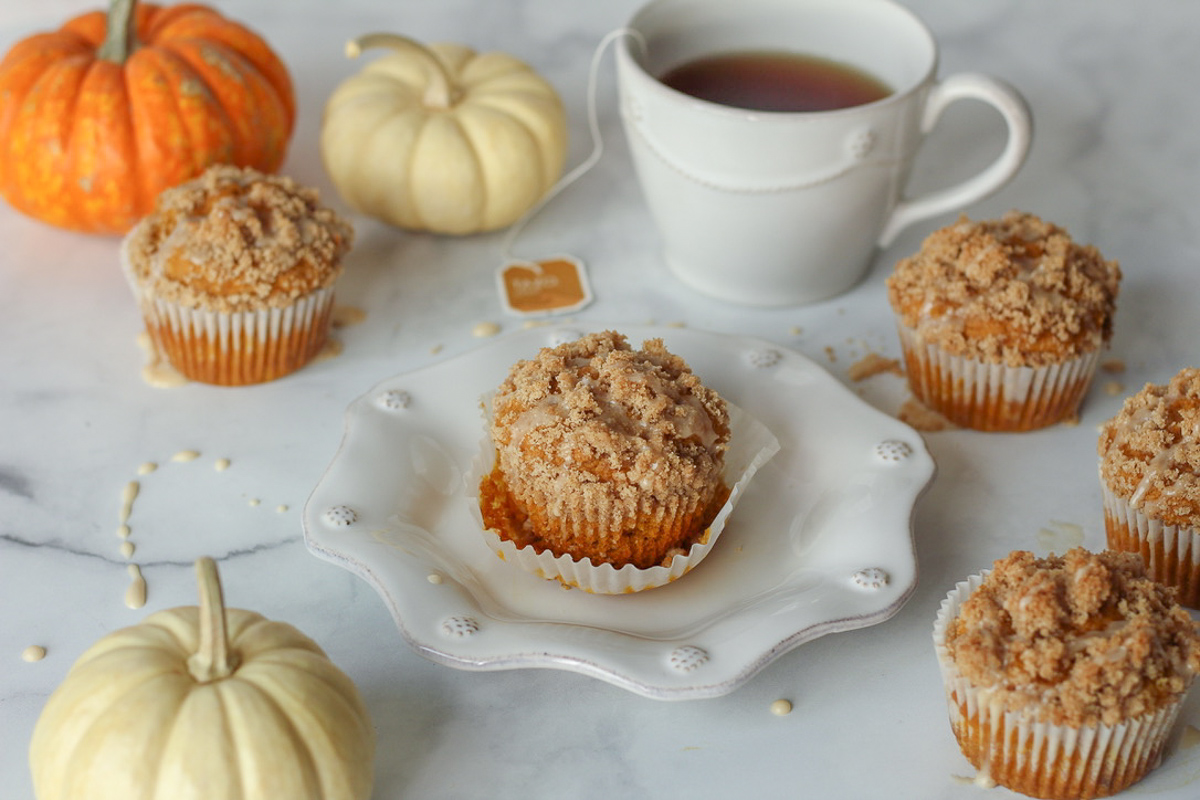
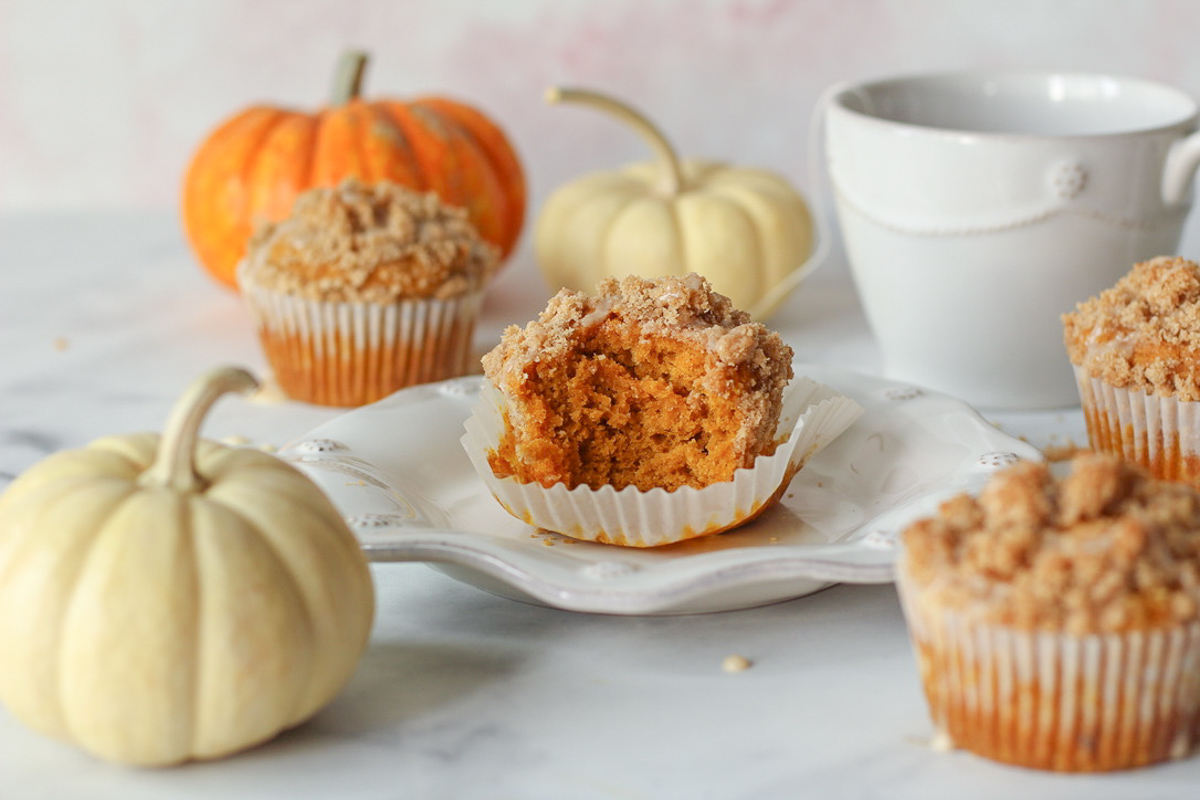
These are the most delicious pumpkin muffins ever! Moist, perfectly sweet, and warmly spiced. Topped with cinnamon streusel and vanilla chai drizzle, these easy muffins are perfect for cool fall mornings and afternoon snacks. These homemade muffins are full of autumn spices and pumpkin flavor that nobody can resist!

As you might be able to tell from my recent recipes, I’m a wee bit obsessed with pumpkin! It’s such a delicious fall flavor, and autumn only rolls around once a year! The chai drizzle on these muffins is next level, you seriously have to try it! These are like a chai pumpkin spice latte in pumpkin form, and it’s amazing!


Muffin Ingredients:
1 3/4 cups all-purpose flour
1 teaspoon baking powder
1/2 teaspoon baking soda
1/2 teaspoon pumpkin pie spice
1/2 teaspoon cinnamon
1/2 teaspoon salt
1/2 cup butter, melted
1/2 cup granulated sugar
1/2 cup brown sugar
1 1/3 cup canned pumpkin puree
2 eggs
1/4 cup buttermilk
1 teaspoon vanilla
Streusel Ingredients:
1 cup all-purpose flour
1/2 cup brown sugar
1 teaspoon cinnamon
1/2 cup cold butter, cut into pieces
Chai Spice Mix:
1 1/4 teaspoons cinnamon
3/4 teaspoons ground ginger
1 teaspoons cardamom
1/4 teaspoon allspice
Vanilla Chai Glaze Ingredients:
1 cup powdered sugar
2 tablespoons heavy cream
1/4 teaspoon vanilla extract
1/2 teaspoon Chai Spice Mix (Above)
Directions:
Preheat the oven to 350 degrees F, and line a muffin tin with liners.
For the streusel: mix together the flour, brown sugar and cinnamon in a small bowl. Rub the butter into the dry ingredients until the mixture resembles course crumbs. Set aside.
In a medium mixing bowl, whisk together the dry ingredients, flour through brown sugar. In a large bowl, using a rubber spatula, combine all the wet ingredients, pumpkin through vanilla. Add the dry ingredients, and mix until just combined, scraping down the sides of the bowl as necessary.
Fill each well about 3/4 full of batter, and top generously with the streusel, gently pressing the streusel into the top of each muffin. Bake 20-22 minutes or until a toothpick comes out with moist crumbs. Allow the muffins to cool in the tin for 10 minutes, and allow to cool completely before drizzling with glaze.
For the glaze: combine the powdered sugar, heavy cream, vanilla and chai spice mixing together with a fork. Transfer to a plastic piping bag, and drizzle the glaze over each cooled muffin.


More Fall Recipes:
This simple bourbon apple crisp is one of my very favorite fall recipes! It’s a tradition in our house to bake some easy fall sweets, turn on a fun Halloween/autumn movie (Hocus Pocus anyone?), and smell the delicious autumn recipe baking while we watch it. Way better than a fall scented candle because your house smells amazing, and you get to eat it! (Not recommended with candles, I’m told.)

The leaves are starting to change colors where we live, and it’s seriously feeling like fall! That makes my heart SO happy – I actually squealed with delight today seeing them and scared Charlotte by accident haha!
If you haven’t noticed, autumn is by far my very favorite season. It’s so cozy, and such a perfect time for fun fall baking recipes, snuggling up and watching movies…I could wax romantic about it all day long!
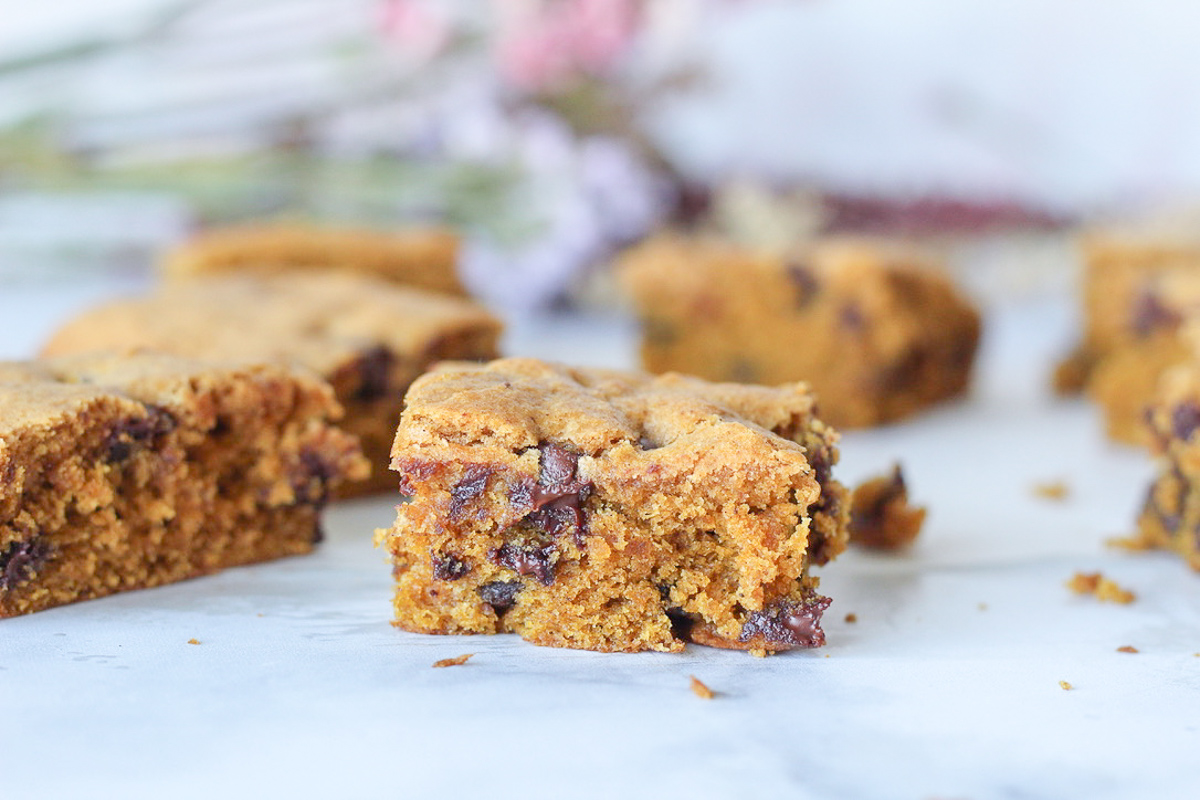
If you’re looking for a super quick and easy fall baking recipe for this weekend, these pumpkin bars are it! Soft and cakey with just enough spice, these are guaranteed to be gone faster than you may like to admit. I’m such a sucker for pumpkin and chocolate recipes, aren’t you?
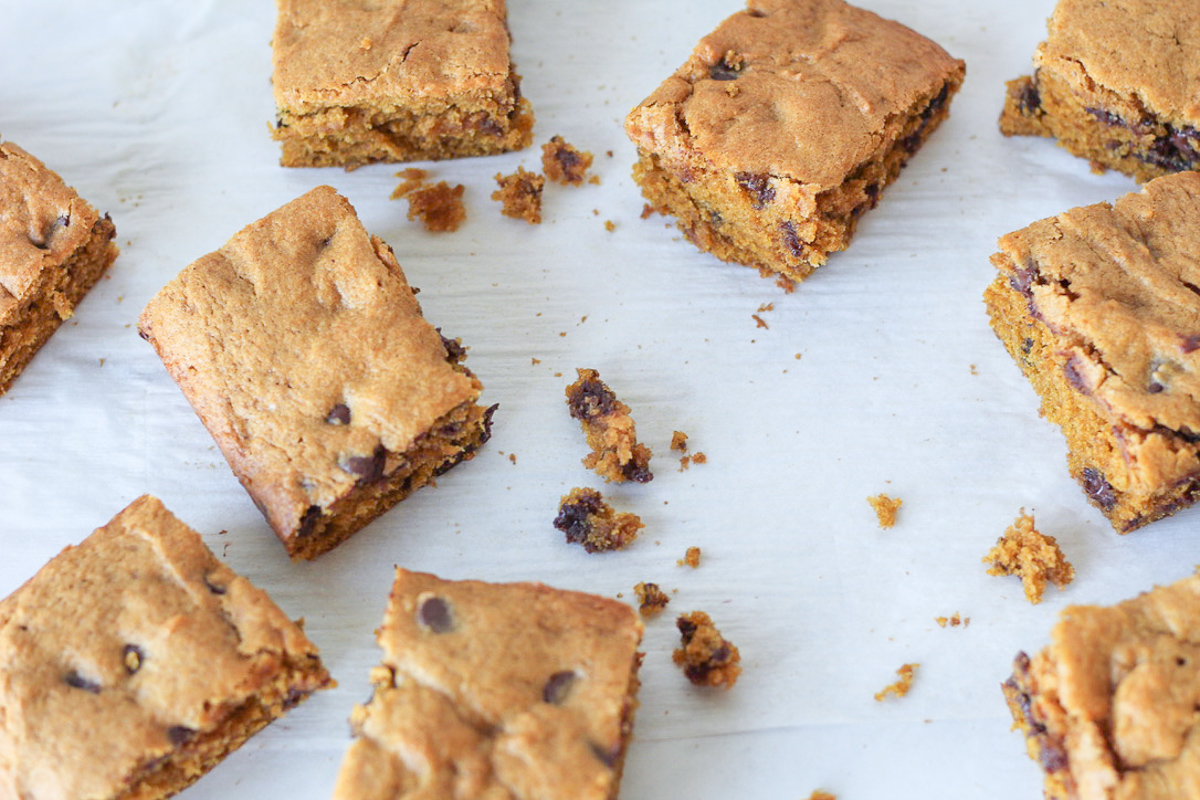
These delicious pumpkin bars take 10 minutes max to whip up, and 30 minutes to bake. So in under an hour you could be enjoying scrumptious, gooey, melted chocolatey pumpkin bar goodness. No excuses, just make them! (And if you’re looking for a super delicious cake, check out my Pumpkin Caramel Layer Cake recipe!)


Makes 24 Bars
Ingredients:
2 cups all-purpose flour
1 tablespoon pumpkin pie spice
1 teaspoon baking soda
1 teaspoon baking powder
2/3 cup granulated sugar
1/2 cup packed brown sugar
1 teaspoon salt
1 cup butter, melted
2 eggs
2 teaspoons vanilla extract
1 cup canned pumpkin (not pumpkin pie filling)
1 1/2 cups chocolate chips
Directions:
Preheat oven to 350 degrees F,. Grease a 9×13 pan with butter, and line it with parchment paper with a small overhang for super easy removal of the bars.
In a medium mixing bowl, whisk together the dry ingredients, flour through salt. In a large mixing bowl, whisk together the butter through pumpkin. Add the dry ingredients to the wet ingredients, and combine with a spatula. Stir in the chocolate chips.
Spoon the dough into the prepared baking dish, using the spatula to make sure it’s evenly spread. Bake for 30 minutes, or until a toothpick comes out clean. Allow to cool at least 10 minutes before serving.


Fall officially begins in just a few short days – can you believe it? We’ve had a week of rainy, colder days and that crisp Autumn chill has started to settle in around us. Fall is my very favorite season. I love the changing leaves, sweaters, and of course, everything pumpkin spice!
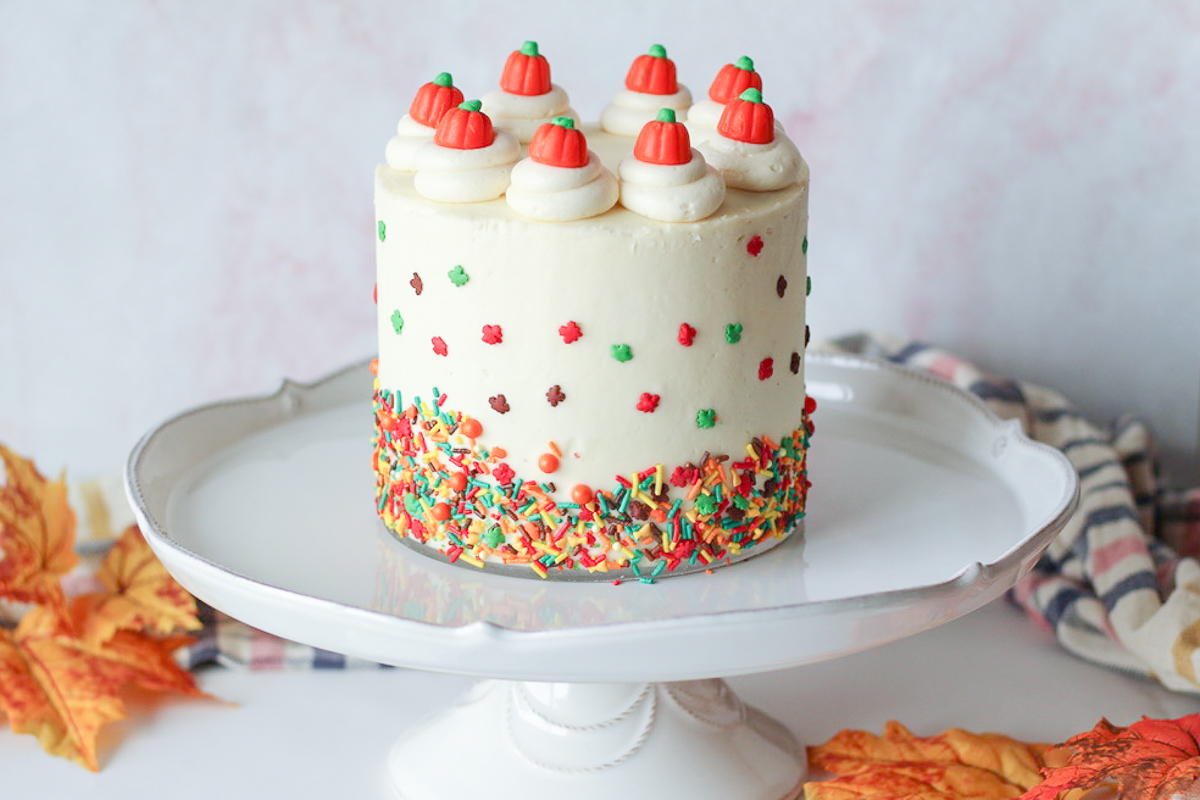
This is my first fall dessert of the season, and I’m SO excited to share it with you! Pumpkin cake with caramel filling, and cream cheese frosting. It’s definitely hard to pick a favorite of my cake recipes, but this pumpkin cake is going to be pretty dang hard to beat! The rich, spicy pumpkin cake pairs so well with the creamy caramel, and is topped with delicious cream cheese frosting.
As a fan of all things pumpkin spice, I thoroughly approve this cake recipe! I also love how quick and easy it is to make. Since the cake calls for melted butter, there’s not even any need to wait for butter to soften. You’ll also notice that for the caramel filling, I used store bought caramel sauce (this one is my favorite). If you have a favorite caramel recipe, feel free to use it instead.
Also, can we talk about how cute those fall sprinkles are? They’re called Fall Harvest by Sweets and Treats, and it’s safe to say I’m obsessed!


Cake Ingredients:
2 3/4 cups all-purpose flour
2 teaspoons baking powder
1 teaspoon baking soda
2 teaspoons pumpkin pie spice
1/2 teaspoon salt
1 1/2 cups granulated sugar
3/4 cup brown sugar
1 cup butter, melted and cooled
3 eggs
1 1/2 cups pumpkin puree (not pumpkin pie filling)
1 teaspoon vanilla
1/2 cup buttermilk
Cream Cheese Frosting Ingredients:
8 oz cream cheese, room temperature
1 cup butter, softened
1 teaspoon vanilla
3-4 cups powdered sugar
Directions:
Preheat oven to 350 degrees F, and grease and line three 6″ cake pans. Whisk together the dry ingredients, flour through brown sugar. In the bowl of your stand mixer, combine all the wet ingredients, butter through buttermilk. Add the dry ingredients in two batches, mixing on low speed until just combined and scraping down the sides of the bowl as needed.
Distribute the batter between the three prepared cake pans. Bake for 35-40 minutes, or until a toothpick comes out with moist crumbs.
For The Frosting: beat the cream cheese and butter in your stand mixer fitted with the paddle attachment until light and fluffy. Add the vanilla. Add the powdered sugar one cup at a time. Once all 3 cups are added, beat on high speed for about 5 minutes. If the frosting is too wet, add more powdered sugar. If it’s too dry, add a bit of heavy cream.
Assembly: Start with cold cakes. I wrap mine well in plastic wrap once cooled, and refrigerate for at least a few hours. Frost the bottom layer with a thin layer of cream cheese frosting. Pipe a small perimeter of frosting on top, and fill the well with caramel sauce. Repeat for the second layer. Use the remainder of the frosting to cover the outside of the cake. Decorate with candy pumpkins and sprinkles!
By the way, be sure to check out my Instagram (@thiscelebratedlife) for videos on how I decorate my cakes!


More Fall Recipes:
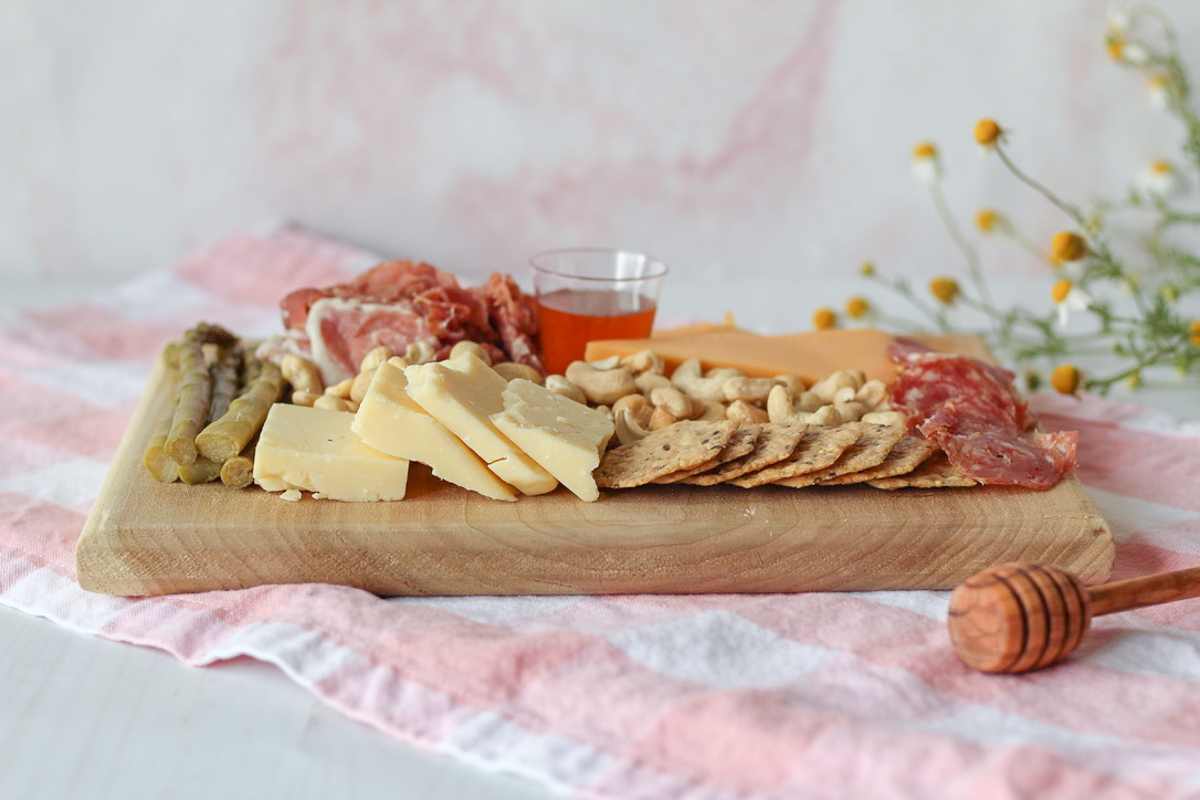
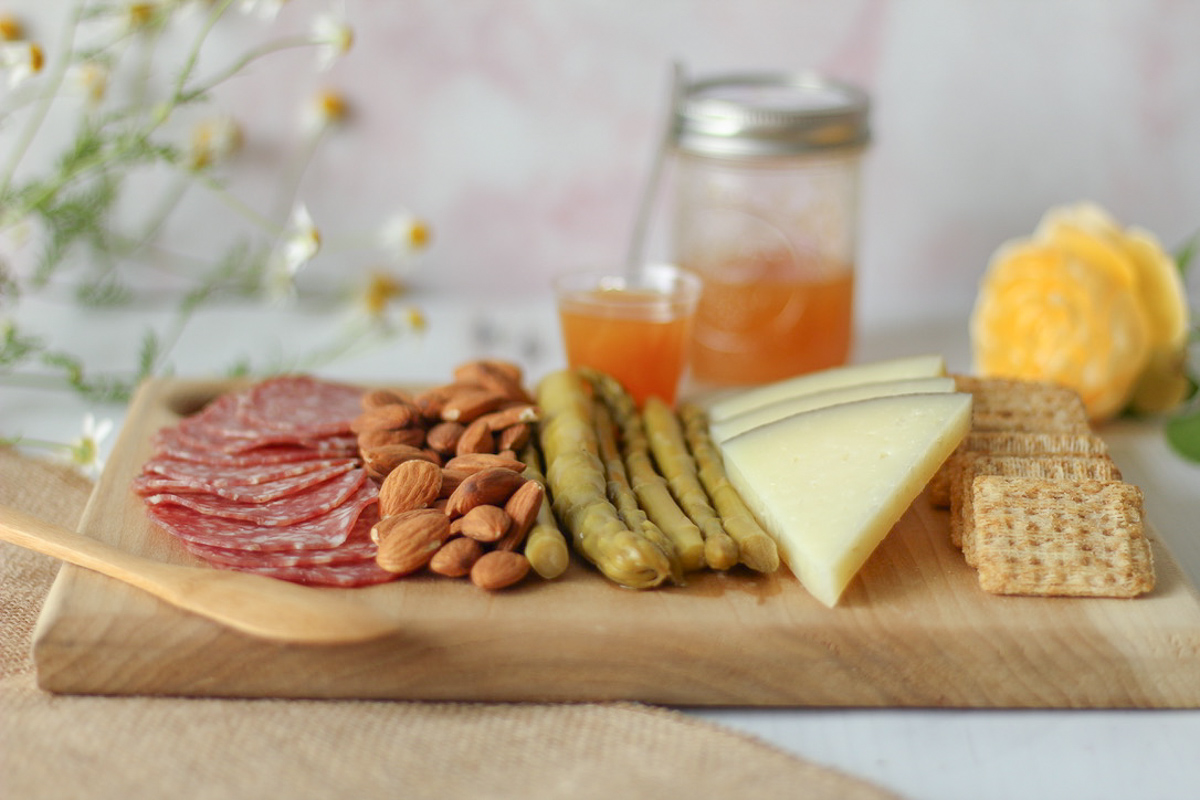
For this week’s post, I joined forces with charcuterie extraordinaire and Pullman, WA local Audrey, from A La Board NW. She specializes in charcuterie and cheese boards for catering local events. I was so excited to sit down with her, learn her top tips for creating charcuterie boards at home, and nibble on some of these delicious goodies.
Charcuterie boards offer many options, satisfy a number of cravings, and also cater to dietary restrictions. Since every guest gets to choose what they eat, charcuterie boards are great for anyone with gluten-free, vegetarian, and low carb diets! They’re perfect for casual girls nights or elegant Thanksgiving dinners, and the smallest of celebrations to the greatest of gatherings. While they’re packed with complex flavors and look beautiful, they are very simple to assemble – especially when you know these 3 secrets!

As much content as this guide has, it really is as simple as pulling cheeses, meats, crackers, and produce out of your fridge and cupboards, throwing it on a cutting board, and arranging it to please the mind’s eye. The best boards are made from curiosity and creativity – plus a little wine to help you get there!

Secret #1: What To Buy
Spreads: One of my favorite ways to add extra interest and excitement in charcuterie boards is to serve it with spreads! Spreads that I often use are mustards, jams, and honey. Mustards add spice, zest, mild sweetness, and a light bitterness that kicks your bite up a notch. Jams pair really well with softer cheeses and fatty meats.


Secret #2: How Much To Buy
This can be a tricky one, when you’re standing in the grocery store staring at the cheese selection. Do I need 3 or 4 wedges? Is that too little? What if I have a ton leftover?
Well, here’s a little trick-of-the-trade formula so you never have to second guess again! First, figure out how many people you’re serving. Typically serving sizes for meats, cheeses and starches are around 1 ounce, and the normal serving size for fruits and vegetables is 2-3 ounces.
What does this mean? Let’s say you’re expecting 10 guests. You will need total:
- 10 ounces of each cheese
- 10 ounces of each meat
- 20-30 ounces of fruit
- 20-30 ounces of vegetables
- 10 ounces of crackers or bread
Some people will enjoy more, and some will enjoy less, and this formula accounts for that. Pretty easy, right?


Secret #3: How To Assemble Charcuterie Boards
You’ve chosen all your items, you have the perfect amount of each, and now it’s time to assemble your board!
You’ll notice that the prettiest charcuterie boards focus on variation in textures and colors. For example, bright red cherries alongside a wedge of creamy brie make both foods stand out and instantly look more appetizing.
Start by laying out your starches, taking up about 1/3 of the board. Add your cheeses in separate spots of the board, and place your meats in between. Then fill in any empty spots with fruit, nuts, extra crackers – whatever looks good to you! Nestle small containers of mustards and jams in between. (For these boards, we used shot glasses for the condiments. They’re the perfect size, and inexpensive!)