this is a page for

Category: dessert

Frosé (Frozen Rosé Sorbet)

You may have noticed by now if you’re following me on Instagram that I really enjoy wine! Despite how much I love baking, I would choose a glass of wine over dessert any day. My interest in wine is actually a relatively recent one, and I’ve been having so much fun learning about it for the past few years. I’m really excited because next month (cue panic mode as my to-do list flashes before my eyes) we’re going to leave for our vacation in Britain and France. On that trip we’ll be visiting Bordeaux, and doing soooo much wine tasting! I can’t wait to learn as much as I can about Bordeaux wines!

I was trying to brainstorm fun sorbet recipes the other day, and opened my fridge for inspiration. Voila! Rosé sitting right in front of me! So I poured a glass (naturally) and got to work! I love that this sorbet has a hint of fruit and citrus, but the flavors only compliment the rosé flavor – they don’t overwhelm it. This recipe includes kiwi, which was actually the suggestion of our friend Patrick who is the winemaker at Merry Cellars Winery in Pullman. I would never have thought to add that flavor, and I love it! This is perfect for enjoying on a hot summer day! 

Ingredients: 

1/2 lb strawberries, hulled and sliced
1 kiwi, peeled and sliced
1 cup water
1/2 cup granulated sugar
2 cups of your favorite rosé wine (I used Merry Cellars)
2 oz fresh grapefruit juice


Directions:

Rinse, hull and slice strawberries and kiwi into smallish slices. Place the fruit into a medium saucepan, and cover with water. Bring the fruit water to a boil, and them reduce to medium and simmer for about 15-20 minutes. You will know it’s ready when the berries have lost their color, and the water is dark pink. Strain the fruit out using a fine mesh strainer, being careful not to squish the berries or kiwi. Discard the fruit once the liquid is strained out. 

Pour the liquid back into the saucepan, and add the sugar. Bring to a boil again, and then simmer for about five minutes, stirring as the sugar dissolves. Once all the sugar is incorporated, take the syrup off the burner and allow to cool completely. 

Pour the rosé into a medium bowl, and whisk in the grapefruit juice. Add the strawberry kiwi syrup a little at a time, tasting as you go. Sweetness is a personal preference, so it’s nice that you can so easily control it in this recipe. Once the ingredients are combined, transfer the frosé to a shallow baking dish, cover carefully with plastic wrap, and freeze overnight. I know, that’s the hardest part!! The first time I made this I tried to freeze it in my ice cream machine, but because of the alcohol I found it didn’t really work.

The next day you will be able to enjoy your cold, refreshing frosé and instantly become the most popular person on the block! 

Do you like wine as much as I do? Then you will also love my Merlot Chocolate Truffles!

Want more celebration in your inbox? Be sure to subscribe so you don’t miss another post! 

Key Lime Pie Bars

 My brother’s favorite dessert is key lime pie, which means that at least once a year on his birthday we all get to enjoy it! I decided to try my hand at key lime, but opted to make bars instead of a pie because the serving size can be made smaller. Then I won’t feel guilty for having a second piece! Totally legitimate reasoning, right?

I love how easy these key lime bars are to make! If you want to try your hand at a pie but find that daunting for whatever reason, give these bars a go. You won’t be disappointed!

key lime bars
https://www.thiscelebratedlife.com/p/blog-page_12.html

This recipe uses condensed milk which obviously contains sugar, but no added sugar otherwise. In my opinion it really doesn’t need it! I love the combination of ginger and lime, and the chopped ginger adds nice pops of flavor to these bars. If you’re not a fan of ginger, it’s totally optional and you can leave it out. The other unique flavor added is cinnamon in the crust. I love how it complements the lime and ginger but is incredibly subtle.

If you need or want to make this recipe dairy free or just like the taste of coconut, you can replace the butter with melted coconut oil, and substitute full fat canned coconut milk for the condensed milk at a 1:1 ratio. It will definitely give the bars a coconut taste, but I like coconut and lime together! The eggs are crucial for a custard though, so if you also need to avoid eggs this recipe is probably not the one for you.

key lime bars

Ingredients: 

1 1/2 cups graham cracker crumbs
1 tsp cinnamon
5 Tbs melted butter
4 egg yolks
1 Tbs key lime zest
2/3 cups key lime juice
1 (14 oz) can condensed milk
2 Tbs finely chopped crystalized/candied ginger (optional)

Directions:

Preheat oven to 350 and grease an 8×8 pan.

Stir together graham cracker crumbs and cinnamon. Mix in the melted butter until combined, and evenly press the mixture into the bottom of the greased pan.

Bake for about 10 minutes or until the crust is lightly browned and solid. Set aside but keep the oven on.

Fit the bowl of a stand mixture fitted with the whisk attachment. Add the egg yolks and beat on high speed until thick – about 3-5 minutes. Add the lime zest and continue to beat until combined. Lower the speed to low and slowly add the condensed milk with the machine running. Once all the milk is added, raise the speed back to high until all combined and continue beating for a few minutes. Reduce the speed to low again and add the lime juice and ginger.

Once all the ingredients are combined, pour the mixture over the baked crust. Bake for about 15 minutes or until the filling is just set. You’ll know because when you move the pan the filling won’t jiggle anymore.

Let cool until the pan is room temperature, and then put in the refrigerator for at least 6 hours, but preferably overnight.

Cut into squares and serve with whipped cream if desired.

Enjoy!

Want more celebration in your inbox? Be sure to subscribe so you don’t miss another post!

Blueberry Banana Bread

This quick and easy blueberry banana bread is a healthier take on the classic banana bread recipe, and is perfect for dessert or even breakfast! Blueberries naturally sweeten the bread, keep it moist and add a pop of fresh flavor to every bite.

Banana bread is right up there with chocolate chip cookies for comforting baking recipes, don’t you think? Maybe it’s the homey smell of it baking, maybe the warm, lightly spiced, lightly sweet flavor. Or seeing the steam rise as you slice warm pieces to enjoy. Whatever it is, whenever I’m feeling like I need a pick-me-up, this blueberry banana bread is there to save the day!

My baby Charlotte is obsessed with bananas, so we buy them regularly! But sometimes we have leftovers and this banana bread is the perfect way to use them! I love that banana bread is so easy to whip up, and it fills your house with the most comforting smell. Seriously, is there anything better than smelling that you’re just a few minutes away from a delicious treat?

Tips For Making Blueberry Banana Bread:

  • Customize it to your heart’s content! Replace the pecans with walnuts, or for a special treat you could use 1/2 cup chocolate chips instead of blueberries for chocolate chip banana bread!  The possibilities are endless, which is part of what makes this recipe so fun.
  • Did you know? You can freeze super ripe bananas, and save them for when you’re ready to bake some banana bread. Just let them thaw on your counter for a few hours before baking.

Print
clock clock iconcutlery cutlery iconflag flag iconfolder folder iconinstagram instagram iconpinterest pinterest iconfacebook facebook iconprint print iconsquares squares iconheart heart iconheart solid heart solid icon

Blueberry Banana Bread

5 Stars 4 Stars 3 Stars 2 Stars 1 Star No reviews
  • Author: Kirsten Bell
  • Prep Time: 15 Minutes
  • Cook Time: 55 Minutes
  • Total Time: 1 hour 10 minutes
  • Yield: 12 Slices 1x
  • Category: Dessert
  • Method: Baking

Description

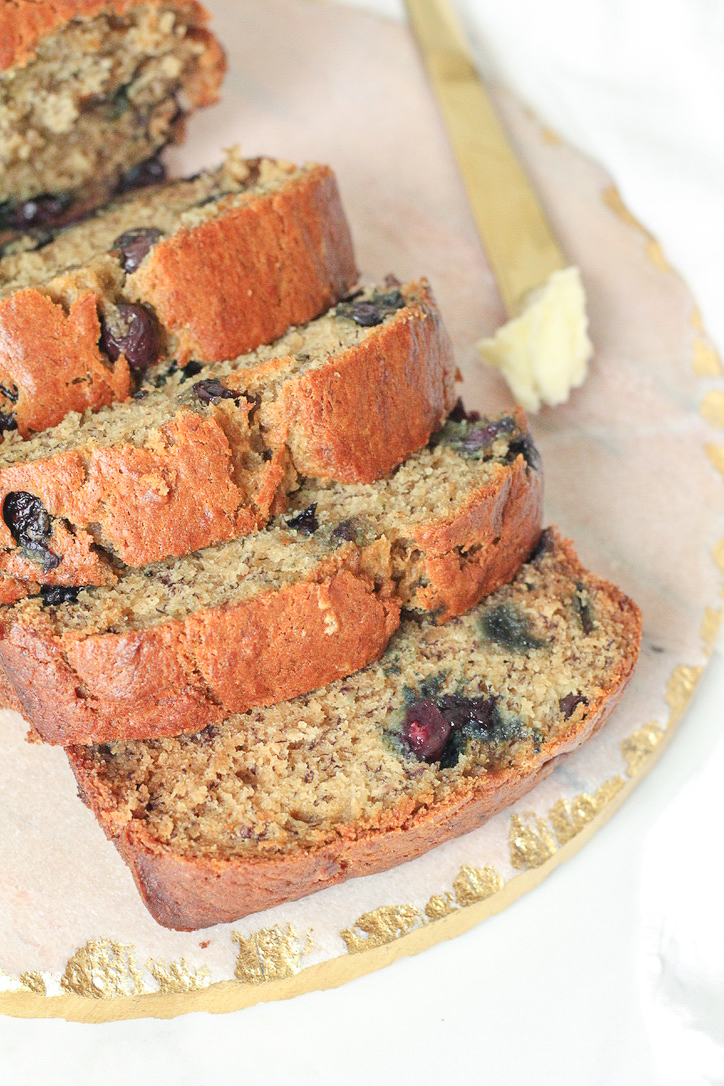
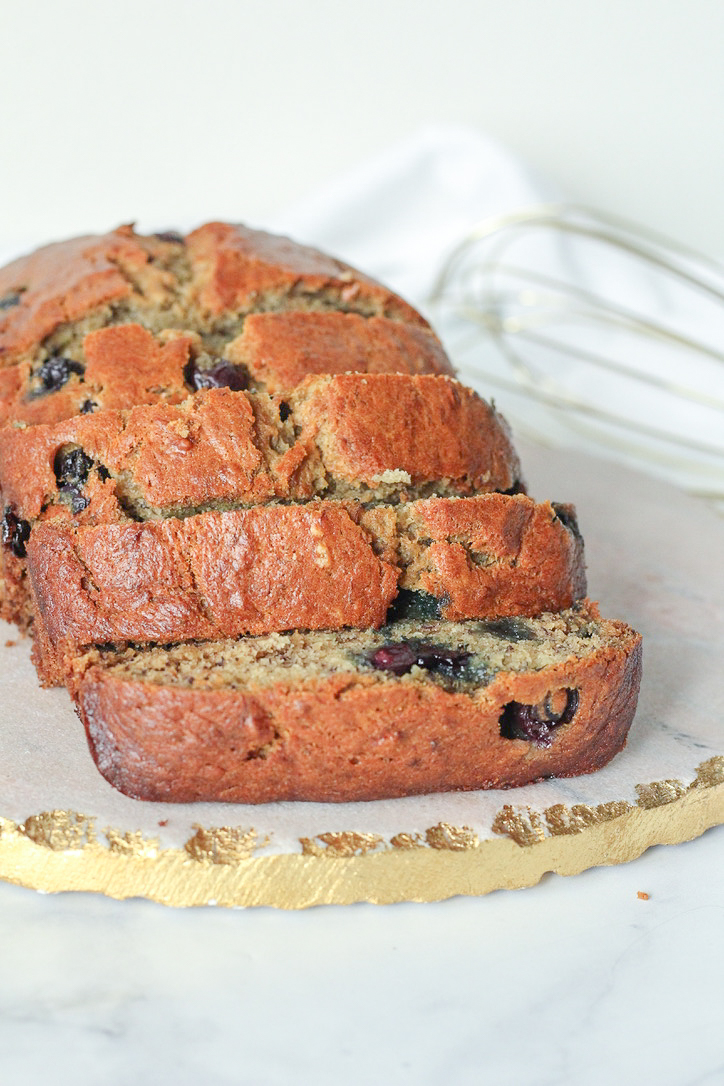
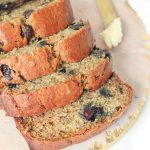
Easy and delicious blueberry banana bread! Full of fresh berry flavor, and perfect for breakfast or afternoon snacks.


Ingredients

Scale

1 1/2 cups all-purpose flour
1 tsp baking soda
1/2 tsp baking powder
1 tsp salt
1/2 tsp ground cinnamon
3 ripe bananas, mashed
1/2 cup melted butter
1/2 cup sugar
1 tsp vanilla extract
1 egg, lightly beaten
1 cup blueberries
1/4 cup finely chopped pecans (optional)


Instructions

Preheat the oven to 350 degrees, and grease a 9×5 loaf pan (I’ve linked my favorites below). Set aside.

In a medium bowl, whisk together the flour, baking soda, baking powder, salt and cinnamon. Set aside.

In the bowl of your stand mixer fitted with the paddle attachment beat bananas, butter, sugar, vanilla and egg until blended.

Add the dry ingredients to the banana mixture in two batches, mixing until just combined.

Gently stir in blueberries and pecans.

Pour the batter into your prepared loaf pan, and bake until a toothpick comes out with moist crumbs – about 55-60 minutes.

Let cool for 30 minutes before removing the bread from the loaf pan, and another 15 minutes before slicing.


Earl Grey Truffles

earl grey chocolate truffle

I have a new and special treat for tea lovers today – earl grey truffles! The tea flavor in these is subtle, but still identifiable. That’s kind of the trick with tea infused truffles. You have to find the perfect middle point between too weak and too strong (and bitter).

https://www.thiscelebratedlife.com/p/blog-page_12.html

Also, a quick note on tea. Most of you have probably heard when cooking with wine to choose one you’d be happy to drink, and the same goes for tea. I tried a few different earl greys for these truffles, and found that this tea yielded the best flavor.

Our good friend Patrick is the winemaker at Merry Cellars Winery (Pullman locals or anyone passing through town, you should definitely stop by!), and he asked me to make these for an event a few months ago. I have to admit that it’s not a flavor I would have probably thought to make, which is one reason why I’m so excited about them!

You’ll see below, or if you’ve looked at any of my other truffle recipes, that truffles take a few steps. I know that can look a little daunting, but I actually love that about these. It means that I can break the recipe into multiple stages, and I don’t need to be in the kitchen all day if I don’t want to be!

Ingredients

3/4 cup heavy cream
4 tbs earl grey tea (you can also use tea bags – just cut open and pour out the leaves.)
1 1/2 cups semi-sweet chocolate chips
1/4 tsp salt
1/2 tsp granulated sugar
1 cup bittersweet chocolate chips

Directions

Add heavy cream to a small saucepan over medium heat. Stir in the tea leaves. Continue stirring the cream regularly so it doesn’t scald on the bottom. You will know it’s ready when the cream turns a light brown color (see photo below for reference), and it has reached a low boil.

 earl grey chocolate truffle

Pour the cream and tea mixture through a fine mesh sieve into a measuring cup, and strain out the tea leaves. I like to use a small spoon or spatula to press extra liquid out of the leaves before discarding them.

Note on the cream: You actually need 1/2 cup of hot heavy cream, but the tea leaves soak up a decent amount of it. After removing the tea leaves I’m left with usually just slightly more than a 1/2 cup of cream. Truffles have a little wiggle room, so a little more than 1/2 cup is just fine – waste not!

Pour the hot cream over the chocolate chips, in a heat safe bowl. Wait a few minutes, and then stir together. If the chocolate chips haven’t completely melted, heat in the microwave in 10 second increments until the chocolate is smooth. Stir in the sugar and salt until all combined.

Chill the chocolate mixture in the fridge for 1.5-2 hours. It’s ready when you can easily roll the chocolate into balls without it becoming a gloppy disaster, but it hasn’t hardened so much that the chocolate can’t be formed.

Roll 1/2 Tbs balls of the chocolate ganache – I usually get about 30.

Melt the bittersweet chocolate chips in the microwave (again, in increments) until smooth.

Dip the ganache balls in the melted bittersweet chocolate. Chocolate dipping tools are actually super handy for this step! The first time I made truffles I didn’t have them, and they still tasted great, but didn’t look super fancy.

After dipping the truffles, put them back into the fridge until the chocolate has hardened.

Truffles are wonderful because they seem fancy, but they’re actually really easy. They’re also a fun way to play with new flavors, like I did with these.

I hope you enjoy!

Want more celebration in your inbox? Be sure to subscribe so you don’t miss another post!

This post contains affiliate links, which means if you follow a link and purchase the item, I may receive a small commission. I promise that any money earned will be used to produce future posts!

Triple Chocolate Stout Brownies with Baileys Ganache

guinness brownies

Well you can tell from the title – these boozy brownies are not for the faint of heart! The brownies themselves are made with reduced stout (I used Guinness), and the ganache is made with Baileys, so while they make a perfect St. Patrick’s day dessert, you can bet I’ll be making these all year round.

If you’re not a fan of beer, don’t worry. Neither am I. You actually can’t taste the Guinness at all in these! The beer just acts as a chocolate flavor enhancer, similar to coffee, and makes for a dense brownie.

https://www.thiscelebratedlife.com/p/blog-page_12.html

I took a note from one of my previous recipes, my merlot chocolate truffles, and reduced the Guinness before adding it to the batter. That just helped give my brownies a more intense, less watery flavor. Ain’t nobody got time for watered down anything, but especially not brownies.

So now for the chocolate. In the brownies themselves there is your usual suspect, cocoa powder, and there are also chocolate chips stirred in to take these up a scrumptious notch. Then instead of frosting, I opted for a Baileys dark chocolate ganache. I know a lot of people like frosting on their brownies, and you can go that route too. I wanted these brownies to be an intense chocolate experience, so that’s why I used a ganache instead.
 
These brownies are ooey, gooey and packed to the brim with chocolate. What more could you ask for?

Brownies Ingredients

12 oz Guinness, reduced to 1/2 cup (see instructions below)
3/4 cup butter, melted
1 cup sugar
1 tsp vanilla extract
2 eggs, beaten
1 cup all-purpose flour
2/3 cup dark chocolate cocoa powder (regular is good too, I just went intense)
1/4 cup semi-sweet or dark chocolate chips

Ganache Ingredients

1/3 cup heavy cream
1/2 cup Baileys
2 cups semi-sweet or dark chocolate chips

Brownies Directions

Preheat the oven to 350. Grease and line a 9×9 pan with parchment paper (parchment paper isn’t necessary, it just makes it easier to get the brownies out).

Pour one bottle of Guinness (or other stout beer) into a small pot, and heat over medium heat until it almost reaches a boil. Reduce the heat to medium-low, and let simmer for about 20-25 minutes – or until it has reduced to between 1/2 and 3/4 cups. Let cool.

Whisk together the cooled Guinness reduction, butter and sugar. Add the vanilla, followed by the eggs.

In a separate bowl, whisk together the flour and cocoa powder.

Add to the Guinness mixture in two batches, stirring until just combined each time. Add the chocolate chips.

Pour batter into the greased pan, and bake for 30-35 minutes, or until a toothpick comes out with moist crumbs. Start checking to see if they’re done after 30 minutes, and then check every 2 minutes after that. There’s nothing worse than an over-baked brownie! Mine were done at 34 minutes, for reference.

Let cool almost completely before covering in ganache.

Ganache Directions 

Measure chocolate chips into a heatproof bowl and set aside. 

In a small saucepan, combine heavy cream and Baileys. Bring to a simmer.

Pour the heavy cream mixture over the chocolate chips, and stir until the chocolate is melted and smooth.

Pour over the cooled brownies, and let set for at least five minutes before serving.

Serve with milk or red wine, and enjoy!

Want more celebration in your inbox? Be sure to subscribe so you don’t miss another post!

This post contains affiliate links, which means if you follow a link and purchase the item, I may receive a small commission. I promise that any money earned will be used to produce future posts! 

This Celebrated Life