this is a page for
Category: savory
Do you ever get caught in a recipe or flavor rut? I do, all the time! Especially when it comes to dinner, we seem to repeat the same meals. I mean – we’re all busy, and coming up with new dinner ideas takes time and energy! One week when Jordan and I were just married, I made grilled cheese and tomato soup so many times that we haven’t had it again since…and that was almost 3 years ago haha! Oops!
So if you need a new, easy weeknight meal idea – this Cilantro Pesto Flatbread is it! Packed with flavor, and done start to finish in under 30 minutes. With protein from the black beans and cheese, this can easily be a vegetarian meal, or add some cooked chicken or pulled pork.
Over the last few weeks I’ve been sharing some of my favorite recipes to make with our Vitamix machine, including our Clean Green Smoothie and Raspberry Sorbet with Mango Coulis. For this pizza sauce I wanted to break out from the traditional red pizza sauce recipe, and use a cilantro pesto instead.
Did you know: the word pesto likely comes from the Italian verb pestare, which means to pound or crush. While we usually think of pesto made with basil, really any herb can be used! Pesto is incredibly easy to make in the Vitamix – I told Jordan I’m never going to buy it again haha! This cilantro pesto is light and fresh with an almost citrus taste. A perfect companion for the black beans, tomatoes and corn that we throw on top.
For the sake of time, I used a pre-made refrigerated pizza crust and canned beans and corn so the only thing I needed to prep was the sauce (which can be made ahead of time) and cutting tomatoes. Pretty darn easy, right?
Cilantro Pesto Flatbread Ingredients:
1 pizza crust (pre-made or homemade)
1 recipe cilantro pesto (recipe below)
2-3 cups italian blend cheese
1/2 cup canned black beans, drained and rinsed
1/2 cup canned whole corn kernels
1 tomato, diced
Cooked chicken, if using
Cilantro Pesto Directions:
Preheat the oven to the temperature specified by your chosen pizza crust. Line a baking sheet with parchment paper, place the crust on the baking sheet and spread the cilantro pesto sauce evenly over the crust, leaving about 1/2 inch around the edges. Sprinkle cheese on top of the sauce – I like a lot of melty cheese haha! Top with the beans, corn, tomato and chicken. Bake per crust directions, and enjoy!
Want to add even more? How about some sliced onions and chopped green bell pepper?
Cilantro Pesto Ingredients:
1/2 cup extra virgin olive oil
1/2 cup grated Parmesan cheese
4 garlic cloves
2 cups cilantro leaves, stems discarded
2 tablespoons walnuts
1/4 teaspoon salt
1/4 teaspoon ground black pepper
Cilantro Pesto Directions:
Load all the ingredients into your Vitamix machine. Select Variable 1, and start your machine. Slowly increase to Variable 7, and blend for 1-2 minutes or until your desired consistency is met. I personally like a really smooth pesto. Add additional salt and pepper to taste.
If making ahead of time, cover and refrigerate for up to 5-7 days or freeze 3-4 months.
I hope everyone has been having a great week so far! Our little corner of the world is seeing way below freezing temps, along with a fresh dusting of snow! It’s crazy to look outside my window right now and think that yesterday I took an hour-long walk with Charlotte and our dogs!
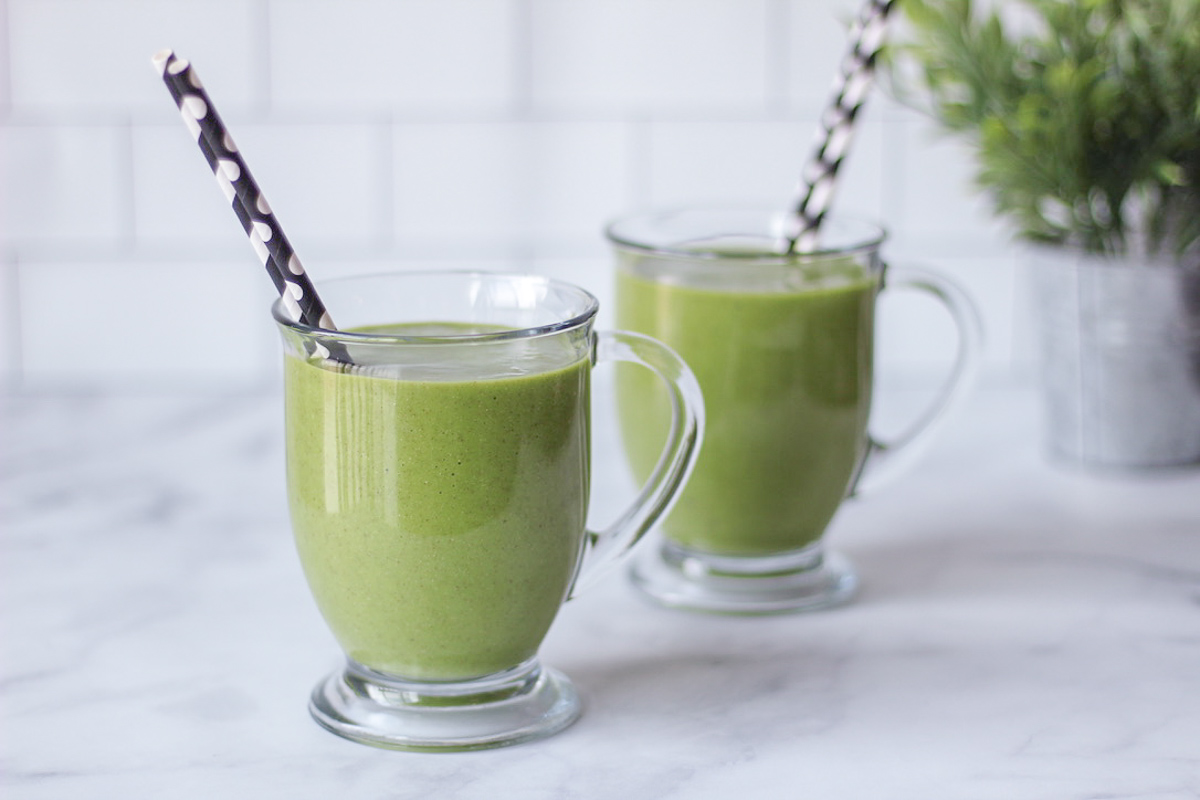
When the temps get low like this, it’s even more important to be sure we’re getting as many fruits and veggies as possible. Give me all the immune system support, please! So today I’m sharing our every day, clean green smoothie with you! It’s full of leafy greens, fresh fruits and a few extra healthy surprises you wouldn’t even know were in there!
If you follow me on Instagram, you’ve probably been seeing my Vitamix allll over my stories. Jordan and I have wanted a Vitamix for years. Years, people! Our old blender was in a pretty sad state, and after doing a lot of research (and testing out some of my friends’ Vitamix machines), I decided it was time to take the plunge. My only regret is that we didn’t get a Vitamix sooner. I am seriously in love, and we have used it every. single. day. We’re making soups, sorbet, pestos – and of course smoothies!
What I love most about our Vitamix is that it makes such smooth drinks. I mentioned above that there’s some secret ingredients in these smoothies, and those are flax seeds and chia seeds! Both are full of healthy omega-3 fats, fiber and protein, but I’ll be honest. I’m not a big fan of seeds in my drinks. When we make these smoothies with the Vitamix, you wouldn’t even know they were there, because they get completely ground up. Seriously amazing!
Makes about 3-4 servings
Ingredients:
1 cup almond milk
1 tablespoon chia seeds
1 tablespoon flax seeds
2 cups spinach
1 cup kale
1 apple, cored and sliced
1 kiwi, peeled
1/2 cucumber, diced
1 cup frozen peaches or mango
Directions:
Add all of the ingredients to your Vitamix machine in the order listed above. Select Variable 1, start your machine, and increase to the highest speed. Blend for 50 seconds. If your machine has the frozen drinks setting, select this setting, start your machine and let it run through the cycle. Serve immediately!
Thank you Vitamix for sponsoring this post. As always, opinions are my own.
Warm pretzel bites, fresh from the oven. Is there really anything better? I always thought that pretzels would be hard to make, and I’m not sure where I got that idea from because they’re actually pretty easy! These are so delicious fresh and warm, served with some honey mustard or my favorite beer cheese dip.
Makes about 32 pretzel bites
Ingredients:
1 1/2 cups warm water (110-115 degrees F)
1 teaspoon sugar
1 teaspoon salt
1 package yeast
2 teaspoons garlic powder
4 cups flour
1 1/2 tablespoons butter, melted (divided)
5 cups water
1/3 cup baking soda
1 large egg yolk, mixed with 1 teaspoon water
Sea salt
Directions:
Whisk together the flour and garlic powder in a mixing bowl, and set aside.
Combine the water, sugar, salt and yeast in the bowl of a stand mixer. Allow to sit for about 5 minutes, or until the mixture starts to foam. Add the flour mixture and 1 tablespoon butter to the yeast mixture, and mix on low using the hook attachment until combined. Increase mixer speed to medium, and knead until the dough is smooth and isn’t sticking at all to the sides of the bowl – about 5 minutes.
Grease a large bowl with the remaining butter (you may not need to use all of it), and move dough to the greased bowl. Cover with plastic, and allow to rise in a warm place for about an hour or until the dough has doubled in size. I like to put mine into the oven, preheat the oven to 170, and then immediately turn the oven off once temperature has been reached.
Once the hour of rising is up, remove the dough from the oven and preheat the oven to 450 degrees F. Line two baking sheets with parchment paper and set aside.
Bring the water and baking soda to a rolling boil in a large saucepan.
While the water heats, lightly grease a large work surface. Divide the dough into 8 approximately equal chunks, and divide each of those chunks into 4 smaller (approximately equal) bite-sized pieces. (So you’ll end up with about 32 pretzel bites.)
Drop about 5 pretzel bites at a time into the boiling water, and boil for 30 seconds. Remove the bites using a large slotted spoon or spatula, and place onto the prepared baking sheets. Brush the top of each bite with some of the egg yolk mixture and sprinkle generously with sea salt.
Bake the bites until golden brown, about 13-15 minutes.
A few weekends ago, Jordan and I made fresh soft pretzel bites. One of my favorite restaurants in town serves their pretzels with beer cheese dip, and I am obsessed! The smooth, melted cheese with just a hint of tangy yeast from the beer pairs so amazingly with soft pretzels. So I just had to make some of my own!
We loved these with my pretzel bites, and you can also serve this beer cheese dip with a fresh baguette or even raw veggies for a lower carb option.
2 tablespoons butter
2 tablespoons all-purpose flour
1 8 oz package cream cheese
1 cup beer
1 teaspoon garlic powder
1/4 teaspoon salt
1/8 teaspoon cayenne
3 cups shredded cheddar cheese
Directions:
In a medium sauce pan over medium heat melt the butter. Whisk in the flour. Melt in the cream cheese. Stir in the beer, garlic powder, salt and cayenne, stirring continuously until the mixture is thick and bubbling, about 3-5 minutes. Add in the cheese, and stir until smooth. Serve hot!
We’ve been having really cold, foggy days for the last week! Cold, crawling fog that seeps straight into your bones. Perfect dementor and/or white walker weather. AND, it’s also perfect warm soup weather! Whenever I really feel chilled and cold, soup is my go-to dinner. I love that this homemade tomato soup recipe is so quick and easy, I can have it on the table, start to finish, within 30 minutes! And the best part is that it tastes like you worked on it all day. One spoonful of this homemade tomato basil soup, and you will never buy canned tomato soup again!
What I love most about this soup is that there are so many different flavors. Tomato, obviously, but also peppery basil and aromatic rosemary, all tied together with the sweet onion and caramelized garlic. In other words: savory flavor explosion! It’s also really easy to make this into a vegan/vegetarian tomato basil soup – just swap out chicken stock for vegetable stock and you’re good to go!
Ingredients:
2 tablespoons olive oil
2 yellow onions, chopped
5 cloves garlic, minced
1/2 teaspoon salt
1/4 teaspoon ground black pepper
2 teaspoons dried rosemary
2 (14 oz) cans diced tomatoes
2 cups chicken stock (or veggie stock for vegetarian version)
1 cup fresh basil leaves, chopped
Directions:
Drizzle olive oil into a large stockpot or dutch oven, and add onions, garlic, rosemary, salt and pepper. Cook over medium-low heat until the onion is cooked and translucent. Add the tomatoes (including juices) and chicken stock. Simmer for about 20-25 minutes, or until the vegetables are all soft. Add the basil leaves. Puree with an immersion blender, or transfer to a blender and blend in batches. Serve hot with grilled cheese, cheesy pesto rolls or alongside a big green salad! Enjoy!


