Style Meets Soiree Guest Post: Spring Tablescape

Happy Sunday everyone! Today I’m sharing a special guest post with you, from my friend Kara! Her entertaining and decor blog Style Meets Soiree is such a source of light and bright inspiration, and I love seeing what she creates! Today she’s sharing her spring tablescape with you – full of beautiful tulips, thoughtful details and fun Easter touches. Check out her post below, and be sure to follow her on Instagram (@stylemeetssoiree)!

Spring is the time of year when nature gets a makeover, so why shouldn’t your tablescape get one as well? Spring is the best time of year to use bright, fun colors to decorate your tablescape. Which is why I decided to decorate this table using pops of my favorite spring colors! 

With Easter being the first holiday of the season, it’s also the great time to bring out a few of your Easter decorations to incorporate into your design. 

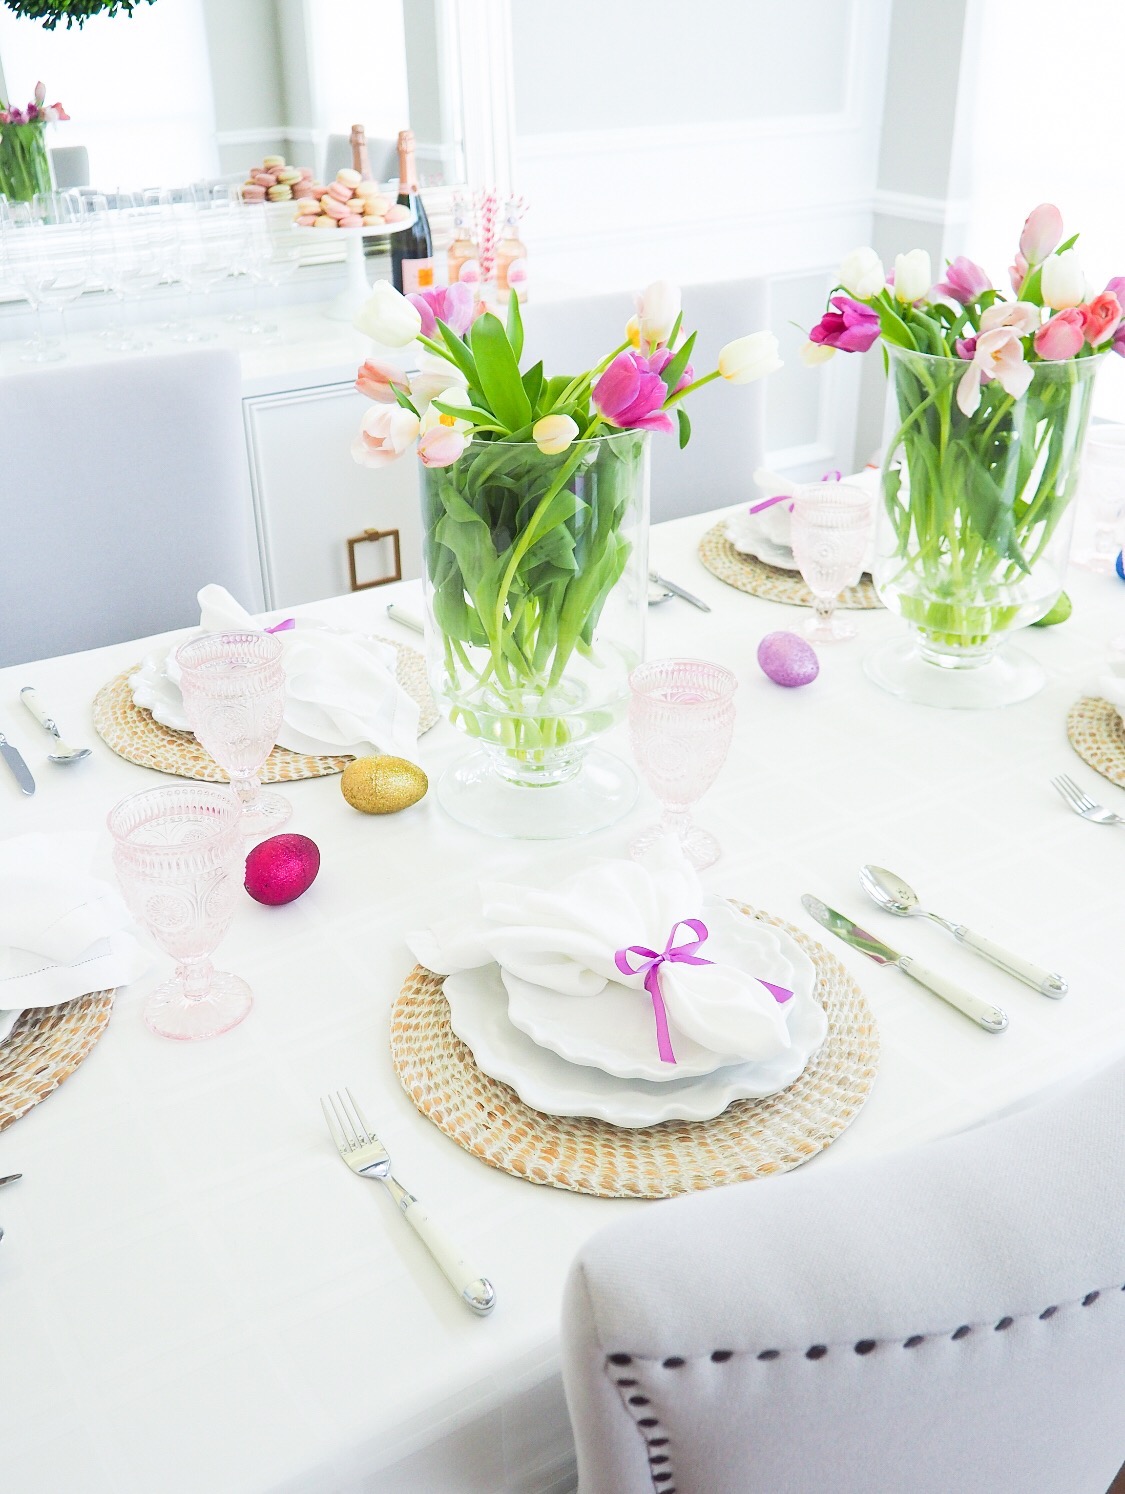
Tulips are the perfect flower to decorate with at this time of year because they just scream “spring”, don’t they?! I decided to use bunches of tulips in bright spring colors at the center of my table in two oversized glass hurricanes. 

I also love to pull out my favorite peony dinnereware from Q Squared for entertaining at this time of year, which I decided to use for my place setting for this tablescape. The whitewashed hyacinth placemat gives the setting a natural, earthy feel. 


To add a touch of ”Easter” without going over the top, I scattered embellished easter eggs down the center of my table and around the flower vases. I then tied white starched hemstitch linen napkins with satin ribbon in a sun drenched peony hue at each of the place settings for the final touch. 


I hope that you have fun and enjoy giving your table a makeover. Whether you decide to go over the top with bright spring colors or not, the important thing is that decorating your table is entirely up to you! So don’t be afraid to get creative! 

You can find more from Kara on her blog Style Meets Soiree and on Instagram (@stylemeetssoiree)! 

Strawberry Basil Crostini

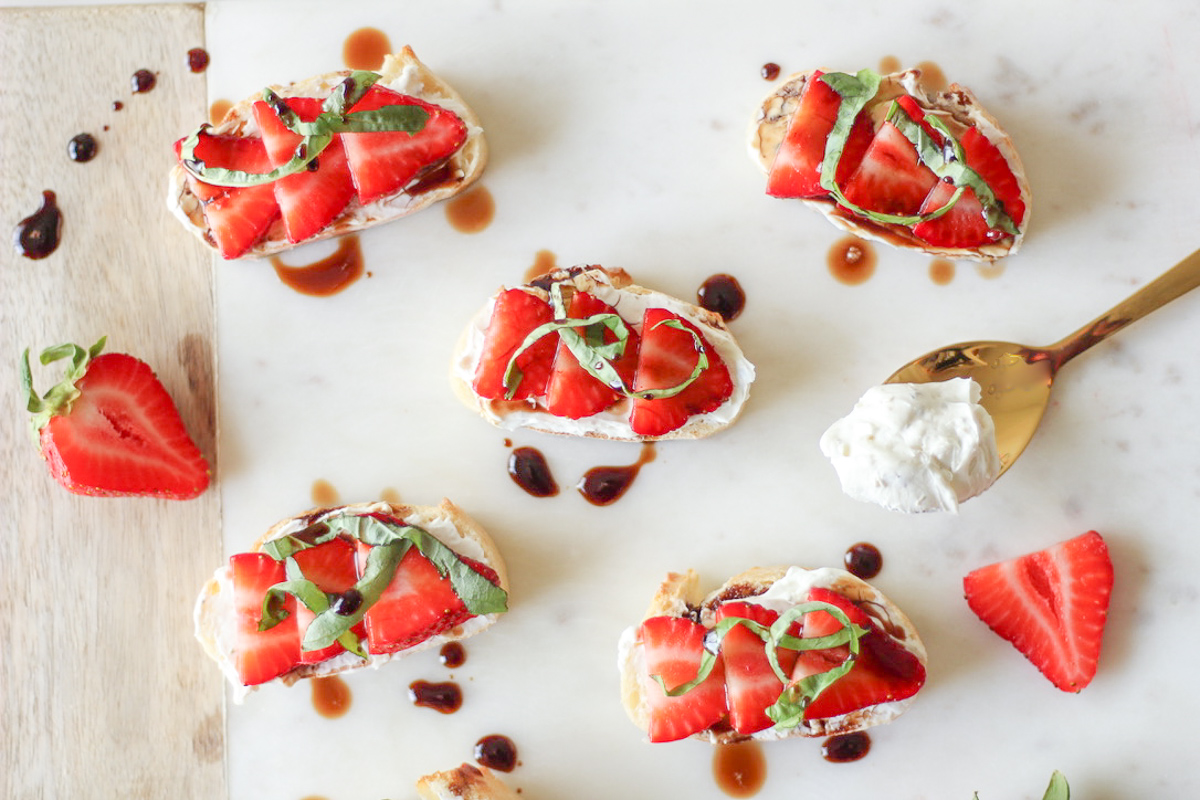
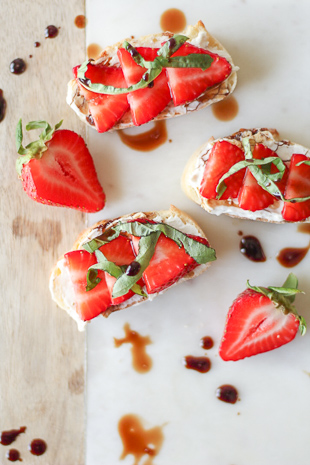
Easy, simple and delicious strawberry basil crostini. The perfect appetizer for your spring and summer tables! Juicy, fruity strawberries meet savory goat cheese, meet fresh basil. A flavor explosion in every bite! And the best part? This is a super quick appetizer to put together, ideal for entertaining!


strawberry basil crostini


One of my favorite meals of all time is just a table full of appetizers. It’s such a fun way to get bites of a lot of different flavors, and everyone can decide how little (or how much!) they want to eat! A few weeks ago I shared super delicious Fig, Brie & Prosciutto Rolls, which are another easy recipe for an appetizer party! And today’s recipe are these seriously delicious Strawberry Basil Crostini. I love mixing sweet and savory flavors, and these appetizers are a perfect mix of sweet from the fruit and savory from the cheese! Your guests will never want cocktail hour to end!


easy strawberry basil crostini

 
easy strawberry appetizer


I’m so excited to serve these crostini at spring picnics, summer brunches and Mother’s Day! Can I tell you a secret though – I’m not usually a fan of goat cheese. Or stronger cheeses in general. But in these, I’m obsessed. I use cream cheese mixed with the goat cheese to soften the flavor, and it’s beyond delicious. With the strawberries and basil – total perfection! But honestly I also ate the leftovers with crackers!

By the way, I just grabbed this beautiful white serving platter, and it’s on sale right now! I love that it’s simple enough that I can serve basically anything on it! And at a great price too!

How To Make Strawberry Basil Crostini:

Step 1: First, let’s make the easy balsamic reduction! Balsamic reductions sound fancy but they’re soooo easy! By cooking the balsamic vinegar, we cook out most of the acidity, and are left with a delicious syrup. A tiny bit of honey helps to sweeten it a touch too.

Pour the balsamic and honey into a saucepan over medium heat, and let it cook for about 5 minutes or until thickened. You can make balsamic reduction in advance, and store it in an airtight container in the fridge! It’s good for a few months!


quick appetizer idea


Step 2: Combine the goat cheese and cream cheese! You want them to both be soft for spreading, and if you need to soften them a bit more you can do it in the microwave on 10 second increments.


Step 3: Slice and toast your bread! Keep an eye on it so it doesn’t get too crispy! Meanwhile, slice strawberries and basil. Did you know? You can roll up basil leaves, to make them quicker to slice! The less we chop the basil, the more herb flavor will be left. (If your cutting board is green after chopping, it means all that delicious flavor is left on your cutting board!)


easy strawberry basil crostini


Step 4: Assemble! Spread the goat cheese mixture onto each slice of bread, top with strawberries and basil, and drizzle with balsamic reduction!


And that’s it! You’re just four super easy steps away from easy and flavorful strawberry basil crostini!


Print
clock clock iconcutlery cutlery iconflag flag iconfolder folder iconinstagram instagram iconpinterest pinterest iconfacebook facebook iconprint print iconsquares squares iconheart heart iconheart solid heart solid icon

Strawberry Basil Crostini

5 Stars 4 Stars 3 Stars 2 Stars 1 Star No reviews
  • Author: Kirsten Bell
  • Prep Time: 10 Minutes
  • Cook Time: 5 Minutes
  • Total Time: 15 minutes
  • Yield: 12 Servings 1x
  • Category: Appetizer
  • Method: Cooking

Description

Easy, simple and delicious strawberry basil crostini. Fresh strawberries, savory goat cheese and fresh basil, drizzled with balsamic reduction.


Ingredients

Scale

1/2 cup balsamic vinegar

1 Tablespoon Honey

A fresh baguette4 oz herb and garlic goat cheese, softened
8 oz cream cheese, softened
1 bunch fresh basil leaves, thinly sliced
12 strawberries, thinly sliced


Instructions

Combine the balsamic vinegar and honey in a small saucepan over medium heat. Stir continuously, for about 5 minutes or until the mixture is thickened. Allow to cool completely.

Combine the goat cheese and cream cheese in a medium bowl with a spatula. Slice the baguette, and toast in the oven at 350 for about 5 minutes if you’d like the bread to be toasty, but keep an eye on it so it doesn’t burn. Spread each piece of bread with a generous amount of the cheese, and top with the sliced strawberries and basil. Drizzle the balsamic blaze over each piece just before serving.


Notes

Balsamic reduction can be made ahead of time, and stored in an airtight container in the fridge for a few months!

Cardamom Cake with Rosewater Frosting

Another day, another cake! I’m sure you’ve caught on by now how much I love cardamom. I’ve been using it lately in Vanilla Cardamom Doughnuts and even cocktails! Today, it makes its way into a cake! With dried rose petals actually baked into the cake itself, this is a beautifully feminine/romantic dessert.

This cake would be perfect for a bridal shower, Mother’s Day brunch or as I told a friend just after making it, it would make a delicious and unique wedding cake as well! Both the cardamom and rose flavors are very subtle, and they pair together so well! If you’ve ever tasted baklava, this cake reminds me of those bright flavors. You can have fun asking your guests to guess the flavor too – I bet most of them would be stumped!

I’ve always loved the look of fresh flowers decorating cakes, and for this cake I thought, why not actually bake some rose petals into the cake as well? I bought these edible rose petals for the job (which I also used in these Orange Scented Shortbread Cookies with Rosewater Glaze). I’d say unless your florist can assure you that their roses are organically grown, I’d resist just using fresh rose petals. They’re often sprayed with pesticides that the FDA would not recommend you eat!

Cardamom Cake Ingredients: 

2 cup all-purpose flour
2 1/2 teaspoons baking powder
1/2 teaspoon salt
1 teaspoon ground cardamom
1 cup butter, softened (2 sticks)
1 3/4 cup granulated sugar
3 eggs
1 tablespoon vanilla extract
2/3 cup full-fat sour cream
1/2 cup buttermilk
1/2 cup dried rose petals

Rosewater Buttercream Ingredients:

2 cups butter, softened (4 sticks)
6-8 cups powdered sugar
2 teaspoons vanilla extract
2 teaspoons rosewater extract
1 tablespoon heavy cream, if needed

Cake Directions: 

Preheat the oven to 350 degrees F. Grease and line the bottoms of three 6″ cake pans with parchment paper.

Whisk together the dry ingredients, flour through cardamom.

In the bowl of your stand mixer fitted with the paddle attachment, beat the butter until light and fluffy. Mix in the sugar until combined. Add in the eggs, vanilla, sour cream and buttermilk and mix on low until all ingredients are incorporated. Then add the flour mixture, mixing on low until just combined, scraping down the sides of the bowl as necessary. Stir in the rose petals.

Spoon the batter into the prepared cake pans. Bake 30-35 minutes or until a toothpick comes out with moist crumbs. Allow to cool about 10 minutes in the cake pans, and then invert the cakes onto a cooling rack with the “top” of the cake down. This will help flatten the cakes. Once the cakes come to room temperature, wrap in plastic wrap and freeze for 30 minutes before frosting.

Rosewater Buttercream Directions: 

Whip the butter until light and fluffy. Slowly add the powdered sugar and mix on low speed until incorporated. Add vanilla and rose water extracts. Increase the speed to high, and mix about 2-3 minutes. If the frosting is too thick, add a little heavy cream.

http://www.thiscelebratedlife.com/search/label/recipes

Triple Chocolate Baked Doughnuts

These triple chocolate baked doughnuts are THE recipe for all my chocolate lovers out there! Rich chocolate doughnuts with mini chocolate chips baked in, and then topped with silky chocolate ganache. Basically? The ultimate chocolate recipe for your weekend breakfasts or brunches! Or weekday treats for when that chocolate craving hits!


I was never a huge fan of doughnuts growing up, because I didn’t like how greasy they tend to be. That’s why I love these easy baked doughnuts! They’re healthier, and honestly – tastier too! If that sounds like a winner to you, also check out my recipe for Vanilla Cardamom Baked Doughnuts!

Used In This Recipe:


You’ll notice that these triple chocolate baked doughnuts are way less sweet than a traditional doughnut, which I love. You get the delicious taste of rich chocolate ganache in each bite, along with sprinkles of mini chocolate chips. But leave behind the greasy, I-now-can’t-eat-dessert-for-a-year feeling that I usually get from deep fried doughnuts. So in a nutshell? All the flavor, and no guilt.  Soooo good!


Baked doughnuts are so easy to make – way easier than even a batch of cupcakes! They’re a quick and perfect weekend treat for breakfast or brunch! I use and love this doughnut pan.


Print
clock clock iconcutlery cutlery iconflag flag iconfolder folder iconinstagram instagram iconpinterest pinterest iconfacebook facebook iconprint print iconsquares squares iconheart heart iconheart solid heart solid icon

Triple Chocolate Baked Doughnuts

5 Stars 4 Stars 3 Stars 2 Stars 1 Star No reviews
  • Author: Kirsten Bell
  • Prep Time: 15 Minutes
  • Cook Time: 10 Minutes
  • Total Time: 25 minutes
  • Yield: 12 Doughnuts 1x
  • Category: Dessert
  • Method: Baking

Description

Easy and delicious triple chocolate doughnuts for all the chocolate lovers out there! Full of chocolate goodness, and more delicious (and healthier) than store-bought!


Ingredients

Scale

1 cup all-purpose flour
1/4 cup cocoa powder
1 teaspoon baking powder
1/2 teaspoon baking soda
1/2 teaspoon salt
1 egg
1/3 cup brown sugar
3/4 cup buttermilk
2 tablespoons butter, melted
2 teaspoons vanilla extract
1/3 cup mini chocolate chips

Chocolate Ganache: 

1/2 cup semi-sweet chocolate chips
2 tablespoons salted butter
1 tablespoon heavy cream


Instructions

Preheat oven to 350, and grease two doughnut pans with nonstick spray. (I use coconut oil spray.)

Whisk together the dry ingredients, flour through salt. In the bowl of your stand mixer, beat together the egg, sugar and buttermilk. Then add the butter and vanilla. Add the dry ingredients, and mix on the lowest speed possible, making sure not to overmix in this step. Fold in the mini chocolate chips.

Time to bake! Spoon the batter into a large ziplock bag, and snip off one corner of the bag. Then pipe the batter into each well of the doughnut pan – about 2/3 full. Much easier than trying to spoon it in!

Bake for about 10-11 minutes, or until the edges are slightly browned. Let the doughnuts cool in the pan for a few minutes, and then transfer to a cooling rack.

To top the doughnuts: Combine the chocolate chips, butter and heavy cream in a bowl. Microwave about 30 seconds, or until the chocolate chips are melted. Stir until smooth. Dip each doughnut into the ganache, and then cover with sprinkles if you’d like!


Notes

Doughnuts taste the best the day you make them, but they will store in the fridge for 1-2 days too. Unfrosted, you can also store these in the freezer for about a month! Just allow them to thaw at room temp, and then dip in ganache.

Blackberry Moscow Mules

It feels like spring is just around the corner here. Almost all of our snow is melted, and I’m SO ready for those warm temps (I’m not asking for much, maybe like 65? 70?), fresh flowers, the smell of cut grass…ahh!! I’m ready!

One thing that Jordan and I love to do in the warmer weather is make ourselves a special cocktail, and go sit out on our back patio after Charlotte goes to sleep. We have a pond back there, and in the summer it’s full of frogs and sounds like a sound machine. It’s such a nice and relaxing way to end the day!

That moment is what I had in mind when I was putting together this blackberry moscow mule recipe! The fresh blackberries are a delicious way to add natural, fruity taste and jazz up the recipe a bit! Plus with no extra equipment or specialty ingredients needed, it’s an easy twist on the classic cocktail too.

Whenever I’m mixing cocktails, I always use the best ingredients that I can, because it honestly makes such a huge difference. For moscow mules, I care most about a top quality ginger beer. We’ve always found Fever-Tree to have really good, fresh ginger flavor which is so important in a moscow mule! This post is not in any way sponsored by Fever-Tree, it’s just what we always use! Also I definitely recommend using fresh lime juice – there’s just nothing that can compare! 

Ingredients:

1/4 cup fresh blackberries
1 mint leaf
1 oz vodka
1 oz fresh lime juice
6 oz ginger beer

Directions:

Place copper mug in the fridge to cool. Muddle together the blackberries and mint in a large glass. Add the vodka, lime juice and ginger beer, and stir to combine.

Fill your chilled copper mug with ice, and strain the blackberry mixture into the mug. Garnish with extra blackberries and mint, and enjoy!

http://www.thiscelebratedlife.com/search/label/recipes

This Celebrated Life