search results for

cake

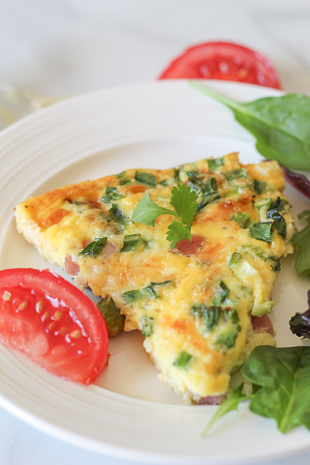
Gruyere, Ham and Asparagus Crustless Quiche

I love a good and easy weeknight dinner idea, don’t you? We always seem to be scrambling, and between meetings, activities and early kid bedtimes, we just need a quick dinner recipe that everyone will love. This easy gruyere, ham and asparagus crustless quiche is also a healthy low-carb meal idea, and tastes just as indulgent as a traditional quiche recipe! Win, win, win!

easy crustless quiche

I also love this ham and asparagus crustless quiche for brunch. It’s quick to make the day ahead (even a few days ahead!), so I can bake a fun dessert or focus on mixing cocktails. Scroll to the bottom – I’ve listed some of my favorite brunch recipes at the bottom of the post to help round out your meal!

easy ham and asparagus crustless quiche recipe


You can really use whatever meat and veggies you like – quiche is so versatile! I’ll often just throw leftover veggies in, because why not! When I set out to make this crustless quiche recipe I knew that I wanted to use asparagus. We’re just heading into asparagus season, and I looooove asparagus, and am always looking up easy asparagus recipes so I can take full advantage!

Easy asparagus crustless quiche recipe

How To Make Gruyere, Ham and Asparagus Crustless Quiche:

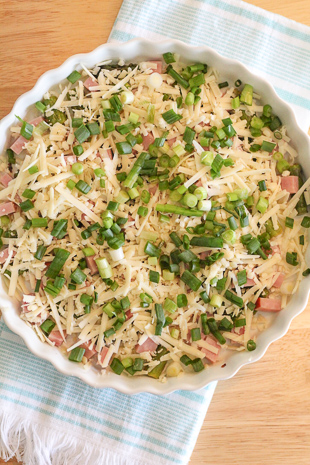
You’ll notice below that I’ve included “step by step” photos for this easy crustless quiche recipe! I realized as I was writing it out that it was hard to describe in just words what the process looks like, so I snapped a few pictures along the way! Hopefully that’s a helpful reference as you make this at home!

Step 1: Firstly, evenly distribute the ham and asparagus in the pie dish.

When I was growing up and helping my mom in the kitchen, she would always ask me “If you got that piece, would you be happy?” as a way to help make sure I evenly distributed ingredients throughout a casserole, cobbler, whatever it was! It’s funny, but I think of that literally every time I make a recipe that requires even distribution of ingredients haha! Would I be happy with that piece? No, it needs more asparagus!

Step 2: Secondly, sprinkle on the cheese! I like lots of cheese. Saving calories on no crust means extra cheese right? (Yes, the answer is always yes!)

how to make quiche

Step 3: Sprinkle the scallions over the cheese. Did you know? Scallions and green onions are actually the same thing. And are delicious!

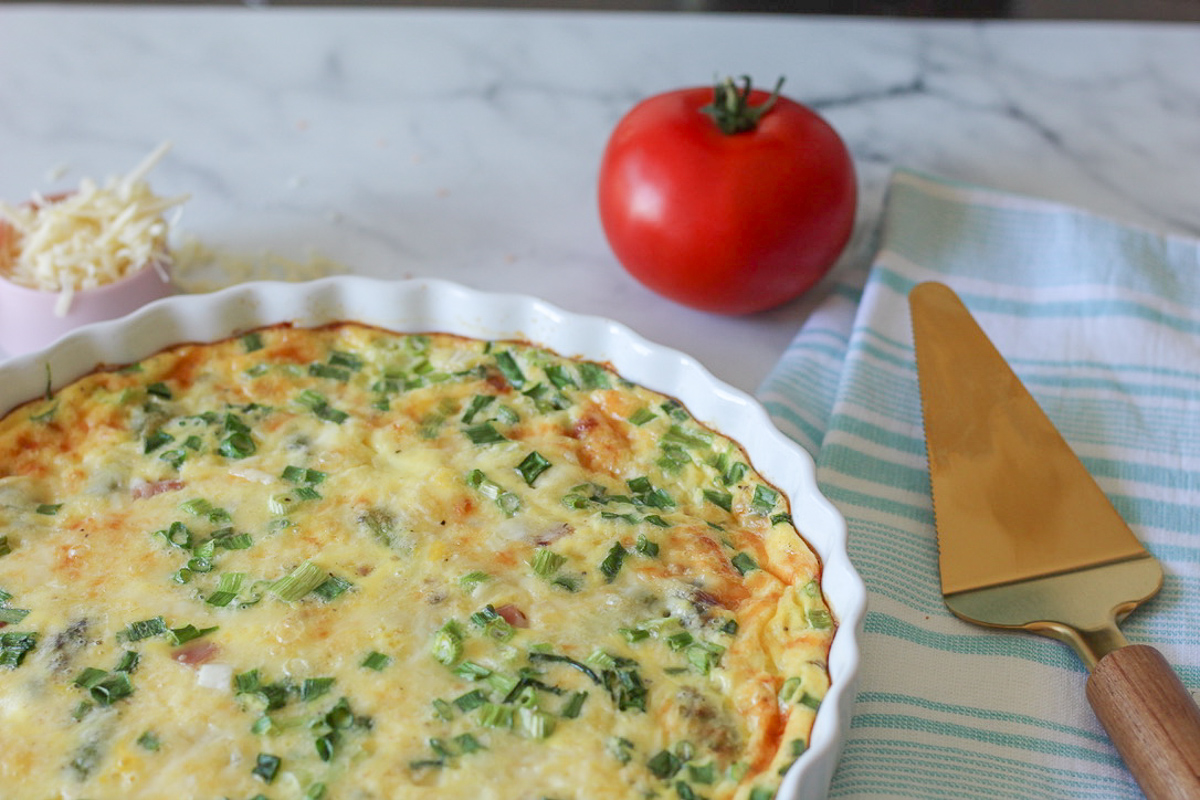
Step 4: Pour the egg mixture over the pie dish, and then bake! It really doesn’t get easier than that, right?

This is such an easy quiche recipe – just a few steps and full of delicious flavor! Remember, you can feel free to experiment with what to use. This is an awesome cleaning out the fridge/pantry recipe since it’s so flexible.

easy crustless quiche recipe


Print
clock clock iconcutlery cutlery iconflag flag iconfolder folder iconinstagram instagram iconpinterest pinterest iconfacebook facebook iconprint print iconsquares squares iconheart heart iconheart solid heart solid icon

Gruyere, Ham and Asparagus Crustless Quiche

5 Stars 4 Stars 3 Stars 2 Stars 1 Star 5 from 4 reviews
  • Author: Kirsten Bell
  • Prep Time: 10 Minutes
  • Cook Time: 35 Minutes
  • Total Time: 45 Minutes
  • Yield: 6 Servings 1x
  • Category: Breakfast
  • Method: Cooking

Description

An easy, healthy and delicious weeknight meal idea! This crustless quiche is perfect for a quick dinner on the go, or a sit-down brunch.


Ingredients

Scale

1 lb asparagus, washed, ends snapped off and cut into bite-sized pieces
2 cloves garlic, minced
1 tablespoon butter
6 eggs
1 cup half-and-half
1/4 teaspoon ground nutmeg
1/2 teaspoon salt
1/2 teaspoon ground black pepper
1 1/2 cups gruyere
5 oz ham steak, diced
3 scallions, white and green sections


Instructions

In a medium pan, cook the asparagus and garlic in the butter over medium heat until the asparagus is fork-tender. Season with a little extra salt and pepper. Once asparagus is done cooking, set aside, and preheat the oven to 350 F.

In a small bowl, whisk together the eggs, half-and-half, nutmeg, salt and pepper. Set aside.

Transfer the asparagus as well as the ham into a greased 9″ tart dish, pie dish, or an 8×8 casserole. By doing this first, we can be sure that all of the meat and veggies are evenly distributed. Top with the shredded gruyere, and then with the chopped scallions.

Pour the egg mixture evenly over the layered ham, asparagus, cheese and scallions. Bake for 35-45 minutes, or until the very middle of the quiche is just a little wobbly in the middle if you give it a gentle shake. Allow to cool before serving.


Finish Your Brunch With These Recipes: 

Brunch Inspiration For Your Table:

Tools Used In This Post:

Sweet and Spicy Mango Jalapeno Margaritas

These mango jalapeno margaritas are a little sweet, a little spicy, with just a squeeze of fresh lime! They’re a perfect Cinco de Mayo drink, and a great summer cocktail recipe.

If you love margaritas, you should also check out my Peach Margarita Cupcakes! Super easy, super delicious and super festive!

I love the taste of jalapenos, but my biggest complaint with a lot of jalapeno cocktails is that they’re way too spicy. As in, not at all enjoyable. So I set out to create a jalapeno margarita recipe with all the delicious jalapeno flavor, and just a hint of spice. Combined with the sweet, fruity mango, this is a margarita you’ll enjoy all summer long!

Makes 1 Margarita

Mango Jalapeno Margarita Ingredients:

1 oz tequila
1/2 oz fresh orange juice
1/2 oz jalapeno simple syrup (recipe below)
1/2 cup mango juice
Juice of half a lime
Ice
Margarita salt

Directions:

To rim the glasses in salt and lime zest, dip the glass in a shallow bowl of fresh lime juice, then dip the glass in a bowl of salt and zest.

Combine the tequila, orange juice, jalapeno simple syrup, mango, lime juice and ice in a cocktail shaker. Shake until combined, and then pour into combined cocktail glass! 

Jalapeno Simple Syrup Ingredients:

1 cup granulated sugar
1/2 cup water
2 fresh jalapeno peppers, stemmed and sliced lengthwise

Jalapeno Simple Syrup Directions: 

Combine all ingredients in a medium saucepan over medium-high heat, and stir constantly until all the sugar is dissolved. Bring to a boil, continuing to stir. Once you reach a boil, reduce the heat to low and simmer for 3-5 minutes.

Remove from heat, and steep for 10 minutes for mild jalapeno simple syrup and 20-30 for spicy jalapeno syrup. Be sure to taste the syrup along the way, so that when it reaches your desired spice level you can strain the pepper out. Strain through a fine mesh strainer, and remove all the pepper. Allow to cool completely.

Similar Recipe From My Blogger Friends: 
http://www.thiscelebratedlife.com/search/label/recipes

Earl Grey Madeleines

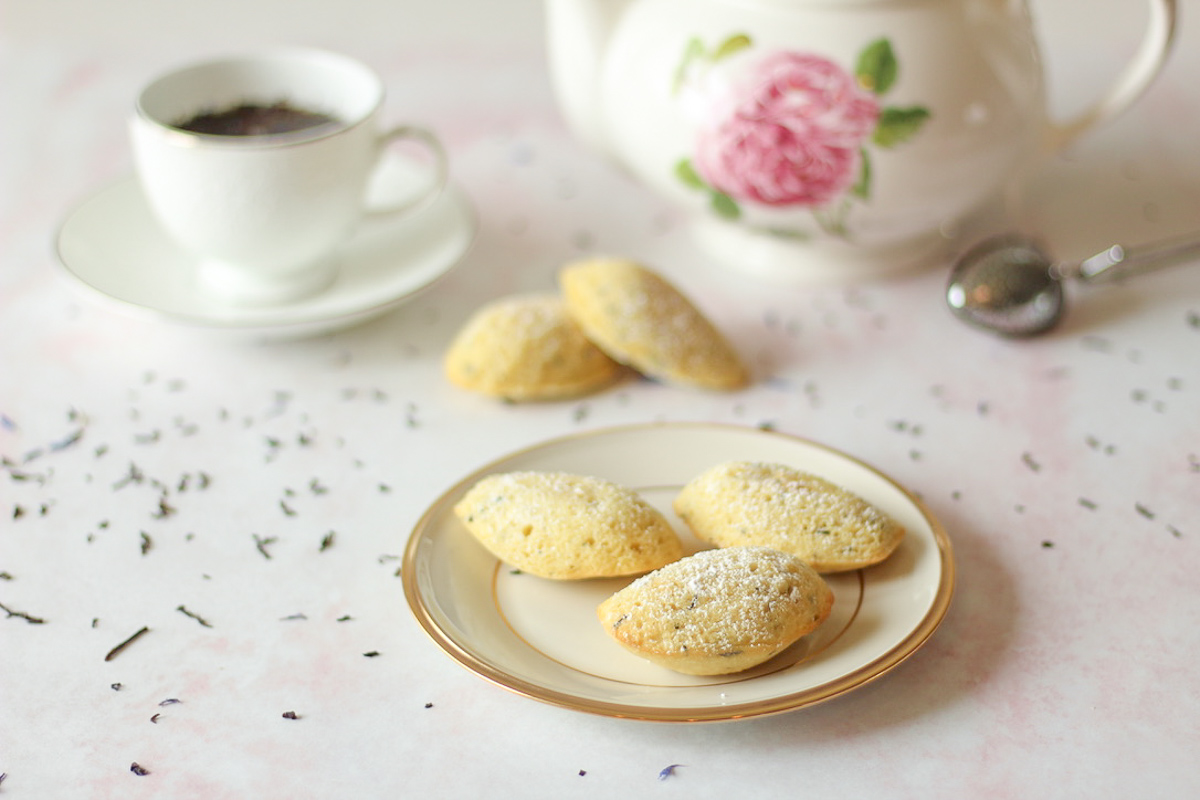
Light, soft and bursting with flavor, these earl grey madeleines are a fun and easy dessert that everyone will enjoy. With a hint of earl grey and sprinkling of fresh lemon, these are a perfect cookie to serve alongside tea or coffee.

Somewhere between a cake and a cookie, madeleines are a light, pillowy and almost feminine cookie that are perfect for teas, brunches, or a special dessert! While they seem fancy, madeleines are actually incredibly easy to make (and even easier to eat!). 

Ingredients:

1 cup all-purpose flour
1 teaspoon baking powder
1/4 teaspoon salt
3 eggs
1/2 cup granulated sugar
1 lemon, zested
6 tablespoons butter, melted
1 tablespoon earl grey tea leaves
1 tablespoon powdered sugar (optional)

Directions:

Whisk together dry ingredients, flour through salt. In a medium mixing bowl, beat eggs and sugar together with a hand mixer until light, about 5 minutes.  Add zest. Add the dry ingredients in two batches, mixing on low speed. Add the butter in two batches, mixing on the lowest speed until just combined. Gently fold in earl grey tea leaves.

Press plastic wrap to the surface of the batter, and then cover the top of the bowl again in plastic wrap. Refrigerate overnight – this is important so your madeleines develop that characteristic hump.

Preheat the oven to 350 F.  Grease madeleine pan with baking spray (I like this coconut oil one). Fill each well with 1 tablespoon batter. Don’t worry about spreading the batter throughout the well, it will do that on its own when it bakes. Bake in the preheated oven 7-8 minutes. Allow to cool in the pan for about 5 minutes, and then remove from pan. Dust with powdered sugar just before serving.

http://www.thiscelebratedlife.com/search/label/recipes

Lemon Poppy Seed Muffins

Lemon poppy seed muffins are one of my favorite muffins of all time. I’m always super tempted to grab one when I see them at bakeries! So I was excited to create a bakery-style poppy seed lemon muffin recipe that we can all make at home! With light flavor, just a hint of bright citrus and a fluffy almost cake-like consistency, these easy muffins are pure perfection. So you’ve got to try them, ok?


By the way! If you’re looking for a new muffin tin, by the way, this one is my favorite! I use it for all my muffins and cupcakes and I’m obsessed.


easy lemon poppy seed muffins

Cherry Orange Traditional Hot Cross Buns

There are very few things that beat the taste of warm, traditional hot cross buns, especially on Easter morning!  These are all the delicious spices and flavors of traditional hot cross buns flavors, with a few surprises! Dried cherries replace raisins, orange zest brightens up the spices, and orange icing completes these for a flavor explosion. The perfect treat for your Easter brunch, served alongside mimosas and coffee, don’t you think? (The answer: Yes, absolutely!)

traditional hot cross buns
 
We love making these sweet, spiced rolls for a special Easter morning treat, and they’re honestly just as good as an Easter dessert with a cup of coffee! Or after-church nibble. Or snack during the egg hunt. Ok basically these are perfect all day long! (Psst! For more Easter recipes, scroll to the bottom of the post!)


easy hot cross buns recipe

traditional hot cross buns


Let’s talk about a few of the flavors in these hot cross buns for a minute. The signature flavor of hot cross buns is the spiced bread. Cinnamon, cloves and nutmeg play a star roll here, especially paired with brandy soaked dried cherries. And add in the fresh orange for the icing? Heck to the yes!


cherry orange hot cross buns recipe

traditional hot cross buns

Cherry Orange Traditional Hot Cross Buns Tricks:

One of my favorite baking tricks is soaking dried fruit, usually in brandy, rum or bourbon (like in my Simple Bourbon Apple Crisp). Since the cherries in these hot cross buns are soaked overnight in brandy, they are bursting with super delicious flavor! Please note: all the alcohol is completely cooked out of these rolls.


Yeasty breads always have a few extra steps, but that doesn’t mean they’re more difficult. These traditional hot cross buns are actually incredibly easy to make! While the bread is rising, you can do other things around the house, run errands – whatever! And when you come home the house will smell like delicious homemade bread. Believe me – soooooo yummy!!


Print
clock clock iconcutlery cutlery iconflag flag iconfolder folder iconinstagram instagram iconpinterest pinterest iconfacebook facebook iconprint print iconsquares squares iconheart heart iconheart solid heart solid icon

Cherry Orange Hot Cross Buns

5 Stars 4 Stars 3 Stars 2 Stars 1 Star No reviews
  • Author: Kirsten Bell
  • Prep Time: 2 Hours
  • Cook Time: 25 Minutes
  • Total Time: 2 Hours and 25 Minutes
  • Yield: 16 Rolls 1x
  • Category: Dessert
  • Method: Baking

Description

Easy and delicious cherry orange hot cross buns! All your favorite flavors of traditional hot cross buns, with some extra flavor surprises!


Ingredients

Scale

Buns Ingredients: 

1/4 cup brandy, rum or apple juice
1 cup dried cherries (double check that there are no pits)
1/3 cup packed brown sugar
1 teaspoon ground cinnamon
1/4 teaspoon ground cloves
1/4 teaspoon ground nutmeg
1 3/4 teaspoons salt
1 tablespoon baking powder
4 1/2-5 cups all-purpose flour
1 1/4 cups warm milk
1 package yeast
2 eggs, plus 1 yolk
6 tablespoons butter, melted
1/2 teaspoon vanilla extract
1 orange, zested

Icing Ingredients: 

1 cup powdered sugar
4 teaspoons fresh orange juice
1/2 teaspoon vanilla extract


Instructions

Combine the dried cherries and brandy in a small bowl, and cover with plastic wrap. Allow the cherries to soak 12 hours, or preferably overnight.

In a medium mixing bowl, whisk together the dry ingredients, brown sugar through flour, and set aside. In your stand mixer fitted with the paddle attachment, dissolve the yeast into the warm milk. Cover with plastic wrap and let sit 3-5 minutes or until it starts to foam. Add the eggs (reserving the one extra yolk), butter and extract, mixing until combined. Add the flour mixture in three batches, mixing until just combined each time. Stir in the cherries and orange zest.

The dough should be soft and a little sticky, but not so sticky that it’s sticking to the sides of the stand mixer bowl. Add extra flour, a tablespoon at a time if this is the case. If the dough can be formed into a ball and doesn’t stick to your hands, it’s done.

Knead the dough lightly, either with your hands on a floured surface, or in your stand mixer fitted with the dough hook on medium speed for about 2 minutes.

Grease a large mixing bowl liberally with melted butter. Set the ball of dough into the bowl, turning once so the top is also greased. Cover with plastic wrap, and allow the dough to rise in a warm place for 1 hour or until doubled in size. I always turn my oven on to the lowest temperature (for my oven that’s 170 F), and once it’s preheated I turn it off. Then I let the dough sit in the warmed (but off!) oven.

When the dough has risen, punch it down to release any air bubbles that have formed. Grease two baking dishes. Divide the dough into 14-16 balls, pinching the bottoms so they stay moist while baking. Cover, and let rise again for 30-45 minutes or until doubled in size.

Now for baking! Preheat the oven to 350 F. Combine the extra egg yolk with a teaspoon of water. With a pastry brush, brush the rolls with the egg wash. Then bake at 350 for 20-25 minutes, or until the rolls are golden brown.

While the rolls cool, prepare the icing. Combine the powdered sugar, vanilla extract and orange juice in a small bowl, whisking with a fork until smooth. If it’s too thick, add more orange juice a teaspoon at a time. Transfer to a pastry bag (no need for a tip), and pipe the icing in a cross over each cooled roll. Serve immediately!

Cover leftover rolls tightly, and store on the counter for 1-2 days, or in the refrigerator for up to a week.


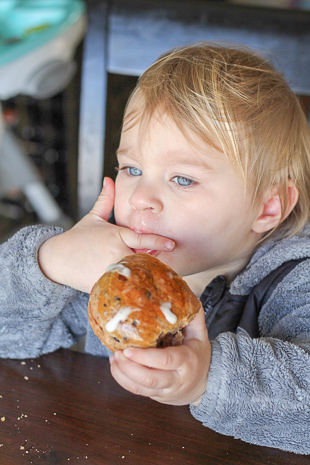
My favorite little taste tester approves!


Want More Easter Inspiration? Check out These Recipes:

This Celebrated Life