search results for

cake

Simple and Rustic St. Patrick’s Day Tablescape

I love celebrating St. Patrick’s Day! Maybe it’s all the green, all the good food, all the beer…who knows! It’s just such a fun holiday, and I love that there are so many totally different ways you can celebrate it! I have really fond memories of my mom making traditional Irish dishes and my aunt and uncle throwing fun parties. It’s just all around good!

This year I decides on a really neutral, simple and rustic St. Patrick’s Day dinner inspiration. I wanted it to feel like the kind of dinner you might enjoy in an Irish countryside pub. Delicious, homey and simple.

On The Table: 

For the table itself I chose to use really neutral colors, sticking with my everyday tablecloth and a burlap table runner. Then I added little pops of sage green with the napkins and these adorable faux boxwood planters!

Keeping with the neutral theme, I used plain white plates on top of larger glass dinner plates, so the glass plates kind of look like chargers.

And of course, what’s a St. Patrick’s Day party without Guinness! I’ve shared my Guinness Cupcakes and Triple Chocolate Stout Brownies with you already (and Guinness beef stew coming next week!), but had to include it in the tablescape too. I love these Guinness pint glasses, which I actually borrowed from my parents! The shape of them is supposed to be “ideal” for Guinness consumption, which I really know nothing about, but I just think they’re cute!

I almost skipped anything gold on the table, but then I saw these Frans Chocolates Coconut Gold Bars and changed my mind! They look so cute on each place setting, and still keep with the neutral feel of the whole table. And I spy a little Leprechaun stealing the gold! Charlotte was so obsessed with these chocolates and kept stealing them off each place setting. It was so funny!

However you plan to celebrate the holiday, I hope you have a great time! Slainte!

Vanilla Cardamom Baked Doughnuts

Oh, do I have a treat for you today: soft, delicious vanilla cardamom baked doughnuts. Honestly? In the past I haven’t been a huge fan of doughnuts. Every once in a while I get in the mood for a good maple bar, but usually they’re just too greasy for me. But these baked doughnuts have changed my mind! Full of that delicious doughnut flavor, but way less oily. These doughnuts are a perfect happy medium and definitely the best doughnuts I’ve ever tasted!

Used In This Recipe:
 
 
vanilla cardamom baked doughnuts

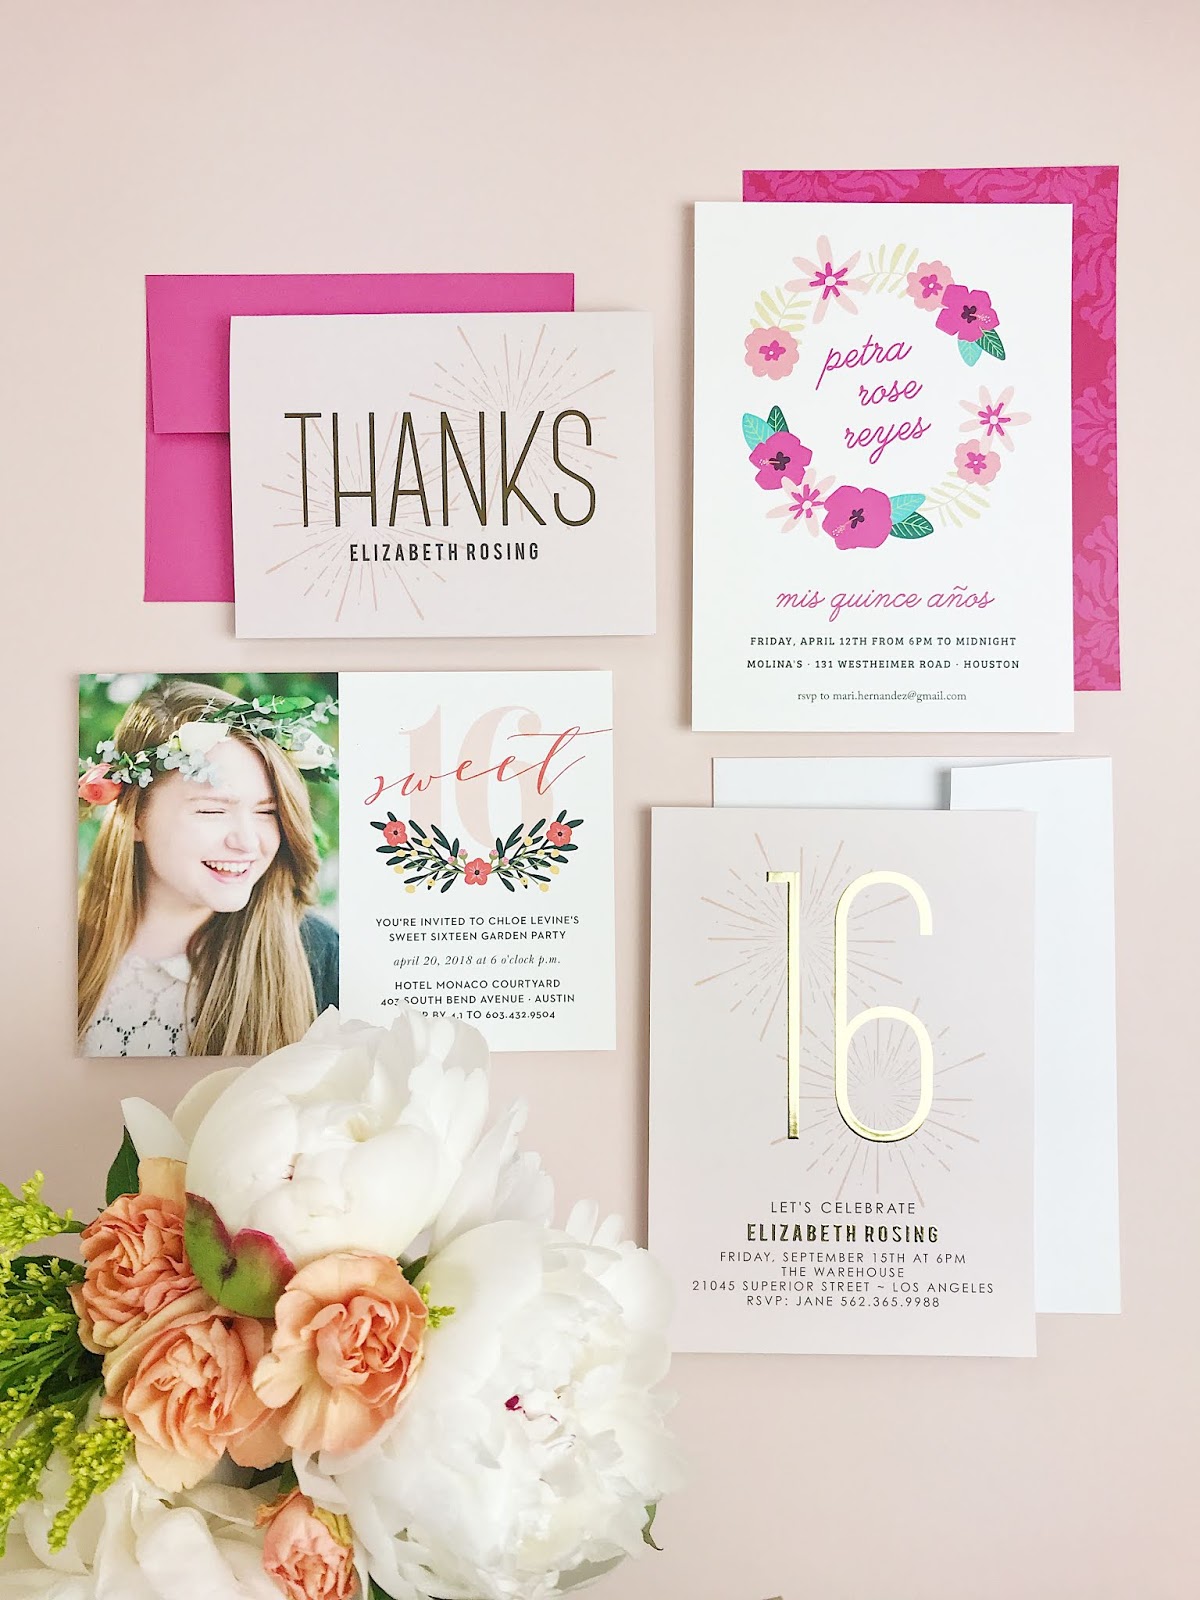
Special Party Invitations From Basic Invite

If you’ve known me for a while, you know that I’m a total paper nerd. When I got engaged, the first thing I was excited to plan was my invitations! I’m all about the quality of paper, customization options, and don’t get me started on accessories like envelope liners!

Maybe it’s because of my love of good paper, or my love of a good party, but I love real paper invitations. They help set the mood of the event, get guests excited for the party, and with a physical invitation guests are more likely to remember important details.

I’m always looking for new stationary companies, and recently came across Basic Invite. I honestly can’t believe I hadn’t discovered them before! With a champagne tasting party around the corner, and hopefully many baby showers to plan for friends in the near future, I decided to order some invitations to check them out. After gushing about them to my friend the other day at coffee, I decided to write up a quick blog post on the experience! If you’re planning a birthday, baby shower, wedding – really any type of special event, you definitely should check them out! Especially because on their site right now, they’re offering 15% off with code 15FF51.

A few things stood out to me about Basic Invite:

1) I almost always have a specific color palette to my event, and I loved that I was able to completely customize the colors of the invitation! Usually when you order invitations you get a few limited choices, but with Basic Invite they literally gave me a color wheel. How amazing is that? You can even choose from over 40 colors of coordinating envelopes. For a self-proclaimed paper nerd like myself, this is pretty exciting! They also have coordinating thank you notes for a lot of their invitations, and I am ALL about that!

2) When I decided on the invitation, I was able to order an actual printed sample. That’s important, because all computer monitors are different and one computer’s teal could be another computer’s bright green. If you’re planning a Breakfast at Tiffany’s party, that’s a pretty important distinction. I’m a bit of a perfectionist, I admit! So having the option to double check everything from color to wording and spacing is amazing.

3) Ok this might be the coolest part – Basic Invite provides an address capturing system. If you’re planning to send out Christmas cards, for example, you can post a link to your Facebook, Twitter – whatever platform you like, and your friends can enter their addresses there. That would have been so handy when I was planning our wedding and my friend’s recent baby shower – I swear it took me weeks to track down addresses!

They offer all sorts of invitations from the champagne party ones I chose, to wedding invites, to baby shower invitations. Having just planned a baby shower for a friend, and hoping to plan many more in the near future, I got totally lost in this section!

They have so many adorable options, even a special section for baby shower invites for twins! Or these sea themed baby shower invitations! Now I’m dying to host an under the sea themed party. Wouldn’t that also be a cute theme for Charlotte’s second birthday party?? I’m already planning the cake in my mind haha! Since they’re so customizable, I might just do that! Ok and last one: look at these butterfly baby shower invitations. Totally in love!

I seriously can’t wait to order invitations from Basic Invite again!

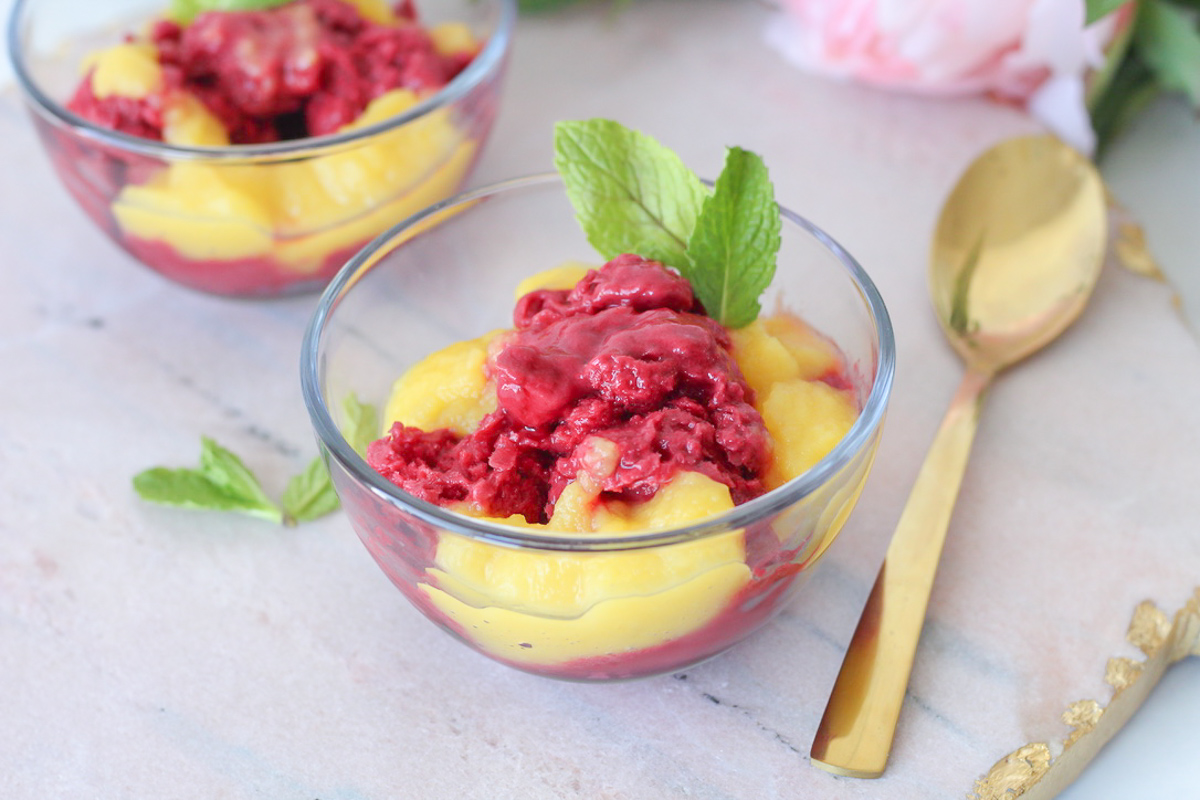
Easy Healthy Raspberry Mint Sorbet with Mango Coulis

You know I love a good dessert! Chocolate cake, red velvet cookies – keep them coming! But sometimes something lighter is exactly what we need, especially for an easy weeknight treat. I love that this sorbet is so quick and easy to make, and with very little (or no) sugar, it’s a naturally sweet dessert alternative.

Mango coulis sounds so fancy, doesn’t it? It’s just as delicious as you think, but probably a lot simpler! I love the bright tropical fruit flavor paired with this raspberry sorbet, and I love the color too!

Used in this post: 

https://www.thiscelebratedlife.com/p/blog-page_12.html

I make this sorbet in our Vitamix machine, which I love! If you don’t have one yet, what are you waiting for? I love that it’s so versatile and can make pretty much everything! In case you missed it, be sure to check out my Green Smoothie recipe from last week!

Ingredients: 

1/2 cup water
2 teaspoons granulated sugar (optional)
5 mint leaves
4 cups frozen raspberry
1 cup mango

Directions:

Place all the ingredients except the mango into your Vitamix machine in the order listed. Select Variable 1, and start machine. Slowly increase to Variable 10, and mix for about 30 seconds. Alternatively, if your machine has a frozen dessert setting, select the setting and press start.

For the mango coulis: puree the mango in the Vitamix until smooth. Refrigerate until serving.

The sorbet may need to be frozen for an hour or two. Garnish with mango coulis and mint leaves, and serve!

Trying this recipe? Be sure to tag me on Instagram so I can see it! I love to see and share what you create!

http://www.thiscelebratedlife.com/search/label/recipes

Dense and Fudgy Brownies With Cream Cheese Frosting

Valentine’s Day is this week, can you believe it? If you haven’t started thinking about a dessert yet, fear not! These dense and fudgy brownies are so quick and easy to make, and are delicious with or without the cream cheese frosting. And made in just one bowl? Heck yes! So grab a bowl and spatula, let’s make some brownies!


Brownies from scratch are incredibly easy – I’d actually say they are 100% just as easy as boxed brownies. But you have so much more control over the ingredients, and they’re also way less expensive. What I also love about these brownies is that they’re not overly sweet, especially if you opt to skip the frosting. They taste like you’re biting into real chocolate!

I am all about one bowl recipes, and you guys are too! They’re always my top performing recipes, and I’m not surprised! I love baking but I’m not a huge fan of kitchen clean up (just ask my husband, ha!). So I love making all of our lives easier and happier with one-bowl desserts.


Print
clock clock iconcutlery cutlery iconflag flag iconfolder folder iconinstagram instagram iconpinterest pinterest iconfacebook facebook iconprint print iconsquares squares iconheart heart iconheart solid heart solid icon

Dense and Fudgy Brownies With Cream Cheese Frosting

5 Stars 4 Stars 3 Stars 2 Stars 1 Star No reviews
  • Author: Kirsten Bell
  • Prep Time: 15 Minutes
  • Cook Time: 25 Minutes
  • Total Time: 40 minutes
  • Yield: 12 Brownies 1x
  • Category: Dessert
  • Method: Baking

Description

Easy, dense and fudgy brownies for true chocolate lovers! Topped with cream cheese frosting for an extra delicious twist!


Ingredients

Scale

Brownie Ingredients:

1/2 cup strong brewed coffee
1/2 cup butter, melted and slightly cooled
1 teaspoon vanilla extract
2 eggs, beaten
3/4 cup all-purpose flour
3/4 cup sugar
2/3 cup cocoa
1/4 teaspoon salt
1/3 cup semi-sweet chocolate chips

Frosting Ingredients:

8 ounces cream cheese, softened
1/2 cup butter, softened
2-3 cups powdered sugar
1 teaspoon vanilla


Instructions

Brownie Directions: 

Preheat the oven to 350 degrees f, and grease an 8×8 baking dish. Set aside.

Combine the coffee, butter, vanilla and eggs in a large mixing bowl. Add the sugar, mixing until just combined. Add the cocoa and salt, give it a quick stir, and then stir in the flour until no flour shows anymore. Stir in the chocolate chips.

Spread batter evenly into the greased baking dish. Bake for 25-30 minutes, or until a toothpick comes out with moist crumbs. Cut into squares, or use a festive cookie cutter and snack on the scraps (waste not, right?).

Frosting Directions:

In the bowl of a stand mixer fitted with the paddle attachment, beat together the cream cheese and butter until light and fluffy. Add two cups of powdered sugar and vanilla, increasing speed to high for 2-3 minutes once all the sugar is incorporated. Add more powdered sugar if the frosting is too soft to hold a peak.

For the coloring, I used Americolor Deep Pink gel color in varying amounts for the different shades of pink.


Notes

I always use gel colors instead of liquid food coloring, because you don’t need to worry about messing up frosting consistency. If you haven’t used gel before, I recommend putting the color onto a toothpick, not directly into the bowl. That’s because gel coloring is really strong, and I’ve messed up by adding wayyyy too much. It’s easy to do!

To achieve this festive Valentine’s Day look, I used three different Wilton decorating tips. The first tip which made the light pink, larger flowers was Tip No. 224. The star tip that made the brighter pink stars was Tip No. 18, and the cream circles was Tip No. 5. I have this decorating piping tip kit, which I love! It has all the basics and I love the storage case. Plus it’s way more cost effective to buy the kit rather than individual tips.

If you love chocolate as much as I do, check out the following recipes too!

Chocolate Bundt Cake with Raspberry Dark Chocolate Ganache

S’mores Cupcakes with Smoked Chocolate Ganache

Chocolate Covered Strawberry Cake

This Celebrated Life