search results for

cake

Boozy Pina Colada Cake

If you love Pina Coladas (and getting caught in the rain), then I have the perfect cake for you today! A delicious, boozy Pina Colada cake. Moist layers of coconut cake with homemade bourbon pineapple curd between, and topped with bourbon coconut buttercream frosting. I mean, seriously. This cake is like a tropical cruise in a cake, and I am here for it!


boozy pina colada cake recipe


Ok so you may be thinking – aren’t Pina Coladas usually made with rum? Yes, yes they are! But it turns out that Brown Sugar Bourbon Pina Coladas are just as delicious (possibly even more so!). I took one for the team and did a taste test, and might make all my Pina Coladas with this Brown Sugar Bourbon from now on!


boozy pina colada cake


If you’ve made any of my other cake recipes, you know that I’m not a fan of sickly sweet cakes. In the past I’ve tried coconut cakes that had way too much sugar for my taste, so I was on a mission to create a Pina Colada cake recipe with all the flavor, and less sugar. And the cherry on the top (see what I did there haha!) is the delicious Brown Sugar Bourbon (BSB) in both the pineapple curd and frosting. It’s sooooo good, and I love that hint of flavor throughout the whole cake!


boozy pina colada cake

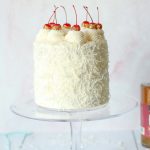
Can we just take a minute to appreciate these gold sparkly cherries? I’m a tiny bit obsessed! The glitter is obviously optional, but suuuuper easy to add for an extra special decoration. And not just for decoration, since it’s edible! All of my assembly tips for this boozy pina colada cake are included in the notes section of the recipe below!


boozy pina colada cake


Quick Boozy Pina Colada Recipe Notes:

*You’ll notice that the cake calls for coconut milk. By this I mean the canned kind that you’ll most likely find in the Asian food section of your grocery store. (I used the brand Thai Kitchen.) When you open the can, you’ll see thick coconut cream on top – that’s the part you want to use since it has the most fat. One can should have enough for this recipe!

**The pineapple curd calls for pineapple juice – and this will need to be the canned version too. I found this in the juice section of my grocery store. For some reason only the canned version works – because of how bottled juice is normally preserved, from what I understand. If you use “normal” pineapple juice, (as in from a plastic bottle) the curd won’t thicken correctly.


How Do You Make Pina Colada Cake From Scratch?

  • Let’s start with the coconut cake! This is a really easy and simple cake, with coconut flavor from coconut yogurt, coconut extract, and coconut flakes. We cream together our butter and our sugar, add in the remaining wet ingredients, and then add the dry ingredients. Pretty simple, right? And soooo delicious!
  • Next up: Our pineapple curd! Curds are so easy to make on the stove, and have really incredible flavor. As in: your friends will be convinced you’re a culinary genius. Which you are, obviously! To make the pineapple curd, we just combine all the ingredients except the butter in a saucepan and let it thicken, adding the butter at the very end. The eggs do all the thickening for us! You can make this ahead of time, and store it in the fridge until you want to assemble your cake.
  • Finally, coconut buttercream! I feel like I’m transported to a tropical place when I get a whiff of this frosting, which is honestly the goal! The key to a fluffy buttercream frosting is whipping it on high speed in the stand mixer (or with your hand mixer) for a few minutes to get lots of air into it!


Print
clock clock iconcutlery cutlery iconflag flag iconfolder folder iconinstagram instagram iconpinterest pinterest iconfacebook facebook iconprint print iconsquares squares iconheart heart iconheart solid heart solid icon

Boozy Pina Colada Cake

5 Stars 4 Stars 3 Stars 2 Stars 1 Star No reviews
  • Author: Kirsten Bell
  • Prep Time: 15 Minutes
  • Cook Time: 30 Minutes
  • Total Time: 45 minutes
  • Yield: 16 Slices 1x
  • Category: Cakes
  • Method: Baking

Description

A tropical cruise in a cake! This pina colada cake is fun, fruity and delicious!


Ingredients

Scale

Coconut Cake Ingredients:

2 cups all-purpose flour
2 teaspoons baking powder
1/2 teaspoon baking soda
1/2 teaspoon salt
1 cup butter, softened
1 3/4 cups granulated sugar
3 eggs
1 teaspoon vanilla extract
2 teaspoons coconut extract
1/2 cup coconut full-fat yogurt
1/3 cup coconut milk*
1 cup unsweetened coconut flakes

BSB Pineapple Curd Ingredients:

1/2 cup pineapple juice (from a can)**
1/3 cup granulated sugar
2 tablespoons cornstarch
4 egg yolks
1 tablespoon Brown Sugar Bourbon
Small pinch of salt
3 tablespoons butter

BSB Coconut Buttercream Ingredients:

2 cups butter, softened
6 cups powdered sugar
1 tablespoon Brown Sugar Bourbon
2 teaspoons coconut extract
Maraschino cherries with stems for garnish (optional)


Instructions

Coconut Cake Directions: 

Preheat the oven to 350 degrees F. Grease three 6″ cake pans, and line the bottom of each pan with parchment paper. In a medium mixing bowl, combine the dry ingredients, flour through salt. Set aside.

In a stand mixer fitted with the paddle attachment, beat the butter and sugar together until light and fluffy. Add the eggs one by one, followed by the extracts, yogurt, and coconut milk. Mix until all the wet ingredients are incorporated, scraping down the sides of the bowl as necessary.

Add the dry ingredients, mixing on the lowest speed until just combined. Stir in the coconut flakes, making sure to scrape down the sides again as the coconut likes to stick.

Distribute the batter evenly between the prepared cake pans (I like to use this scale to be sure each layer is exactly the same). Bake for 25-30 minutes, or until a toothpick comes out with moist crumbs.

Pineapple Curd Directions: 

Combine all the ingredients except the butter in a medium saucepan over medium heat. Whisk constantly, until the mixture is thick enough to coat the back of a wooden spoon. Remove from heat, and stir in the butter a tablespoon at a time. The pineapple curd will continue to thicken as it cools.

Note the assembly directions below for tips on how to add the pineapple curd between each cake layer.

Bourbon Coconut Buttercream

In the bowl of your stand mixer fitted with the paddle attachment, beat the butter until light and fluffy. Add the powdered sugar one cup at a time. Add the Brown Sugar Bourbon and coconut extract. Beat on high speed for about 5 minutes.


Notes

I prefer to frost cold cakes – I find it easier and there are fewer crumbs. I wrap each cake layer in plastic wrap once they’ve come to room temp, and then let them sit in the fridge for at least a few hours so they’re cold when I’m ready to frost

To assemble with the pineapple curd between each layer of cake, frost an even layer of the buttercream on top of the first layer. Then pipe a border of frosting around the edge of the cake layer. Spoon the pineapple curd into the well that you just created. Repeat with the next layer, and then continue with your crumb coat. (And by the way, I’m posting a video to Instagram in a few days that will show exactly how to do this! Find me @thiscelebratedlife on Instagram to see it!

A crumb coat, if you haven’t heard of it before, is a thin layer of frosting to just seal in the crumbs before you fully frost the cake.

Once your cake is fully frosted, coat it in unsweetened coconut flakes (or sweetened if you prefer).

Top with cherries for a true Pina Colada look! If you want to create the same glitter look that I did here, lightly dry each Maraschino cherry, and then dip them in this edible gold glitter. Easy as that!

Looking For More Cake Recipes?

Tools Used In This Recipe:

Thank you to Heritage Distilling Co. for sponsoring this post. As always, all opinion are my own.

The Perfect Summer Dessert: No Bake Oreo Cheesecake

We love summertime! Lazy days on the lake, hikes through the forest, and iced cocktails on the patio. Hot days are also the perfect time to give the oven a rest, and make an easy no-bake dessert! And these no-bake oreo cheesecake bars are perfect! Quick, easy and delicious for when I don’t want to handle the heat.

Used In This Post: 


You’ll notice in the ingredients that I used Organic Valley cream cheese and heavy cream. I am a big believer that the ingredients we use have a huge impact on the final product. It makes sense, doesn’t it? Of course we’re going to taste the ingredients that we put in our food. That’s kind of the whole point! I love that not only are Organic Valley products organic (obviously), but they also taste so rich and creamy. Totally necessary for cheesecake in my opinion!


Making this no-bake oreo cheesecake is seriously so quick and simple, and I love that it doesn’t require any specialty equipment – just a hand mixer, baking dish and you’re set!

3 Easy Steps To Make No-Bake Oreo Cheesecake:

  • Make the crust! Combine crushed oreos and butter, and press it into the bottom of your pan
  • Make the filling! Beat heavy cream until soft peaks form, and set aside. Combine the rest of the filling ingredients, and then gently fold in the whipping cream. You’ll want to use totally softened cream cheese for easy mixing and a creamy filling. Spoon onto the crust, cover and chill either in the freezer or fridge, depending on your timeline!
  • Prepare the ganache if you want to – this is totally optional but it’s pretty and a little extra chocolate never hurt anyone, right haha?!


Print
clock clock iconcutlery cutlery iconflag flag iconfolder folder iconinstagram instagram iconpinterest pinterest iconfacebook facebook iconprint print iconsquares squares iconheart heart iconheart solid heart solid icon

The Perfect Summer Dessert: No Bake Oreo Cheesecake

5 Stars 4 Stars 3 Stars 2 Stars 1 Star No reviews
  • Author: Kirsten Bell

Description

A quick and easy no-bake dessert recipe – perfect for hot summer days!


Ingredients

Crust Ingredients: 

1 1/4 cups crushed Oreo cookies (cream removed). I crushed mine in my Vitamix, but you could also crush them with a rolling pin. 

1/3 cup Organic Valley salted butter, melted


Filling Ingredients: 


1 1/4 cup Organic Valley heavy cream

16 oz softened Organic Valley cream cheese

1/2 cup powdered sugar

1/2 teaspoon lemon juice

1 teaspoon vanilla

12 Oreo cookies (with cream), roughly chopped 


Ganache Ingredients: 

1 cup semi-sweet chocolate chips
1/3 cup Organic Valley heavy cream


Instructions

Line an 8×8 or 9×9 baking dish with parchment paper so that there’s an overhang on the sides. This will make taking the bars out of the pan much easier. Combine the crushed oreos and the melted butter, and press the mixture evenly into the bottom of the baking dish. Move into the fridge while you prepare the filling. 
 
For the filling: beat the heavy cream with a hand mixer until light and fluffy. Set aside. In a large mixing bowl, beat together the cream cheese, sugar, lemon juice and vanilla until fluffy and well combined. Gently fold the whipped cream into the cream cheese mixture with a spatula until evenly distributed. Stir in the chopped oreos. 
 
Cover the oreo crust with the oreo cheesecake filling. Cover with plastic wrap, and freeze 2-3 hours, or refrigerate 4-6 hours or overnight. 
 

For the ganache: Combine the chocolate chips and the heavy cream in a microwave-safe bowl. Microwave for about 30 seconds, and stir until the chocolate chips are fully melted. Drizzle the somewhat cooled ganache over the cheesecake bars.
Cut and enjoy!


Looking for some more summertime desserts? Check these out: 

Equipment Used In This Recipe:

Red, White & Blue Fourth of July Cake

You guys, it is full on summer over in my part of the world! We had a really long drawn out winter, short and sweet spring, and I feel like I woke up one day and it was 90 degrees out! I love summer though, so I’m not complaining. As I write this someone is mowing their lawn, and the smell of fresh grass is coming through my open window. Pure summer, right there.

And you know what else is pure summer? This cake! I’ve always felt like 4th of July really kicks off the summer season. It’s officially July, the weather is almost always hot and sunny, and everyone is full into their summer routines. Well believe it or not, the 4th of July is just three short weeks away, and it will be here before we know it. So today I’m sharing my ultimate 4th of July dessert – Red, White and Blue cake!

This delicious cake is beyond perfect for whatever 4th of July event you’re planning, and is guaranteed to be the talk of the party. The very best part is cutting into it and seeing those fun colors pop through! Sure to delight kids and adults alike.

One of my favorite things about this cake is that it’s so festive before, and after you cut into it. For the sprinkles, I used Sweet and Treats sprinkle mix Stars and Stripes. Very appropriate! For me, a 4 oz bag was enough to decorate the sides of the cakes as well as decorating the top!


Cake Ingredients: 

2 cup all-purpose flour
2 1/2 teaspoons baking powder
1/2 teaspoon salt
1 cup butter, softened (2 sticks)
1 3/4 cup granulated sugar
3 eggs
1 tablespoon vanilla extract
2/3 cup full-fat vanilla yogurt (greek or regular is fine)
1/2 cup buttermilk
Red and blue gel food coloring

Vanilla Buttercream Ingredients:

2 cups butter, softened (4 sticks)
6-8 cups powdered sugar
2 tablespoons vanilla extract
1 tablespoon heavy cream, if needed to thin out the frosting

Cake Directions: 

Preheat the oven to 350 degrees F. Grease and line the bottoms of three 6″ cake pans with parchment paper.

Whisk together the dry ingredients, flour through salt.

In the bowl of your stand mixer fitted with the paddle attachment, beat the butter until light and fluffy. Mix in the sugar until combined. Add in the eggs, vanilla, yogurt and buttermilk and mix on low until all ingredients are incorporated. Then add the flour mixture, mixing on low until just combined, scraping down the sides of the bowl as necessary.

For A Red, White and Blue Cake: Distribute the cake batter evenly into three bowls of the same weight – I used three large cereal bowls. Using a kitchen scale, distribute the cake batter evenly between the three bowls. Empty one bowl into a prepared cake pan (this will be your white).

For the other two, add red and blue gel food coloring. I recommend this kit! You will want to use gel, because liquid will change the cake consistency. The colors will strengthen slightly as they bake, but make sure that the red and blue look about the color that you want the cake layers to look.

Spoon the red and blue batter into the prepared cake pans. Bake 30-35 minutes or until a toothpick comes out with moist crumbs. Allow to cool about 10 minutes in the cake pans, and then invert the cakes onto a cooling rack with the “top” of the cake down. This will help flatten the cakes. Once the cakes come to room temperature, wrap in plastic wrap and refrigerate at least 1 hour before frosting.

Buttercream Directions: 

Whip the butter in you stand mixer fitted with the paddle attachment until light and fluffy. Slowly add the powdered sugar, one cup at a time, and mix on low speed until incorporated. Add vanilla extract. Increase the speed to high, and mix about 2-3 minutes. Add heavy cream if needed.

If you want to see a video of this cake coming together, be sure to follow me on Instagram (@thiscelebratedlife)! I’ll be posting it in the next few days, and you won’t want to miss it!

Homemade Strawberry Shortcakes

Is there anything that screams summer more than a strawberry shortcake recipe?? If you’ve never had homemade strawberry shortcakes, stop what you’re doing right now and make these. Right now. Barely sweet, with most of the sweetness coming from the strawberries, these shortcakes are a serious game changer, and a perfect dessert recipe idea for anyone who doesn’t usually like sweets. But I promise my sweet tooths will love it too!


Simple Lemon Cake with Chocolate Ganache

Just in time for the long weekend – simple lemon cake with chocolate ganache! If you’re a fan of lemon desserts, this is a perfect dessert idea for you! With bright lemon flavor in the cake, homemade lemon curd and fresh lemon buttercream, what’s not to love?? Then we top it with rich chocolate ganache because why not!

simple lemon cake recipe

I feel like spring and summer just scream all things citrus. I’m always looking for delicious lemon dessert ideas. I love that this simple lemon cake is super moist, super lemony and not overly sweet. For this cake recipe I chose to do a semi-naked frosting, so the frosting is super light.

Looking for some more lemon recipes? I’ve listed all my favorites at the bottom of the post!

simple lemon cake

Tips For Making Simple Lemon Cake with Chocolate Ganache:

  • When I’m baking cakes, I make it super easy by splitting the task into two parts. One day I bake the cakes, and then the next day I frost them. I store the baked and cooled cakes by wrapping them very well in plastic wrap, and keeping them in the fridge so they’re cold to frost.
  • If necessary, cut the top of each cake so that they’re flat. This will make frosting easier! I like to do this with cold (refrigerated) cakes and a sharp bread knife. 
  • Cover the top of the first layer of cake with the lemon buttercream. Pipe a border of frosting around the circumference of the cake. Spoon lemon curd into the well you’ve created. Top with the second layer of cake, and repeat steps. Then top with the third layer of cake, and frost the cake lightly for a semi-naked cake like mine, or completely for a fully frosted cake.

To Decorate:

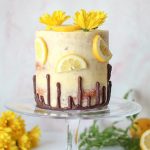
  • If you want to decorate with lemon slices, use toothpicks! I push toothpicks through the lemon rind, far enough in that you can’t see them. Remove all the picks before serving.
  • Chocolate drip looks beautiful, and is really easy! Melt together chocolate chips and heavy cream, and let the mixture cool slightly to just above room temp. Hot ganche will melt your frosting. I like to use a squeeze bottle to drip the ganache over the edges, but you can also spoon it. For an upside down drip like pictured, allow the drip to cool completely in the fridge for an hour. Then flip the cake over, so the drip is on the bottom! Frost the new “top” of the cake.
easy lemon cake recipe

This cake just looks like a bright, sunny summer day, don’t you think? I love how happy it is! A perfect cake for BBQs, picnics and summer birthdays. And the flavor is light enough to enjoy no matter how warm the day is!

My daughter Charlotte couldn’t resist diving into this cake – literally haha! I made this same cake for her second birthday last weekend, decorated in a Disney Cars theme! You can see it on Instagram here.

Print
clock clock iconcutlery cutlery iconflag flag iconfolder folder iconinstagram instagram iconpinterest pinterest iconfacebook facebook iconprint print iconsquares squares iconheart heart iconheart solid heart solid icon

Simple Lemon Cake with Chocolate Ganache

5 Stars 4 Stars 3 Stars 2 Stars 1 Star 5 from 3 reviews
  • Author: Kirsten Bell
  • Prep Time: 30 Minutes
  • Cook Time: 30 Minutes
  • Total Time: 1 hour
  • Yield: 12 Slices 1x
  • Category: Dessert
  • Method: Baking

Description

Simple, easy and delicious lemon cake with lemon frosting and chocolate ganache!


Ingredients

Scale

Cake Ingredients: 

3 cups all-purpose flour
1 tablespoon baking powder
1 teaspoon baking soda
1 teaspoon salt
1 cup butter (2 sticks), softened
2 cups granulated sugar
4 eggs
4 teaspoons vanilla extract
1 cup sour cream
Juice and zest of 3 lemons (approximately 9 tablespoons)

Lemon Curd Ingredients: 

1/2 cup sugar
Juice and zest of 3 lemons (approximately 9 tablespoons)
4 egg yolks
6 tablespoons butter

Lemon Buttercream Ingredients: 

2 cups butter, softened
5-6 cups powdered sugar
Zest of two lemons
Juice of one lemon (approximately 3 tablespoons)
1 teaspoon vanilla extract
1 teaspoon lemon extract

Chocolate Ganache Ingredients: 

1 cup semi-sweet chocolate chips (I always use Ghiradelli)
1/3 cup heavy cream


Instructions

Cake Directions: 

Preheat the oven to 350 degrees F. Grease and line the bottoms of three 6″ cake pans with parchment paper. Set aside. In a medium bowl, whisk together the dry ingredients, flour through salt.

In your stand mixer fitted with the paddle attachment, beat together the butter and sugar until light and fluffy. Add the eggs one at a time, beating until incorporated, and scraping down the sides of the mixing bowl as needed. Add the vanilla extract. Add the dry ingredients and mix on low until just incorporated, being careful not to overmix. Add the sour cream, lemon juice and zest, mixing until all ingredients come together.

Pour batter into the three prepared cake pans, and bake in the preheated oven for 22-30 minutes, or until a toothpick comes out with moist crumbs.

Allow the cakes to cool in their pans for about 5-10 minutes, and then turn them out on a wire cooling rack to cool the rest of the way. I like to turn my cakes upside down to help them flattten. When the cakes are room temp, I freeze them for 30 minutes to make frosting them easier.

Lemon Curd Directions: Combine all ingredients in a medium saucepan over medium-low heat. Be sure to whisk constantly so the mixture doesn’t burn. Cook about 10 minutes, or until the mixture is thick enough to coat the back of a wooden spoon. Remember that the curd will continue to thicken as it cools! Remove the curd from the heat, and melt in the butter. Store in the fridge for up to 5 days.

Lemon Buttercream Directions: In the bowl of your stand mixer fitted with the paddle attachment, beat the butter on high speed until light and fluffy. Add 5 cups powdered sugar one cup at a time, starting your mixer on low and increasing to high with each addition. Add the lemon zest, juice and extracts, mixing on high speed for about 3-4 minutes. Add the additional cup of powdered sugar if necessary. Taste! If you’d like the frosting to taste even more like lemon, add additional zest!

Chocolate Ganache Directions: Combine the chocolate chips and heavy cream in a small mixing bowl. Heat in the microwave for about 30 seconds, and stir well. Add a few more seconds if the chocolate chips aren’t fully melted. Drizzle the chocolate ganache over the sides of the cake with a spoon, or using a squeeze bottle. Then drizzle the chocolate over the rest of the top of the cake and smooth. For this cake I did an inverted drip, which just means that I frosted the cake, did the drizzle, and flipped it over!


Notes

If necessary, cut the top of each cake so that they’re flat. This will make frosting easier! I like to do this with cold (refrigerated) cakes and a sharp bread knife.

Cover the top of the first layer of cake with the lemon buttercream. Pipe a border of frosting around the circumference of the cake. Spoon lemon curd into the well you’ve created. Top with the second layer of cake, and repeat steps. Then top with the third layer of cake, and frost the cake lightly for a semi-naked cake like mine, or completely for a fully frosted cake.

If you want to decorate with lemon slices, this is my trick – toothpicks! I push toothpicks through the lemon rind, far enough in that you can’t see them. Voila! Obviously remove all the picks before serving.

More Delicious Lemon Recipes:

This Celebrated Life