The Future of This Celebrated Life

I launched This Celebrated Life just over six months ago, and wow – I have learned so much about blogging, baking and also myself! I’m having such a great time with it, and I can’t thank you all enough for your support. Every time I see someone subscribe, it literally gives me a thrill of excitement. Because to me, that’s a true indication that I’m doing a good job!

As hinted in the title of this post, you’re going to start seeing a few changes on the blog in the coming months. I wanted to write this post to provide a little update on where This Celebrated Life is headed!

What You Can Expect in Future Posts

When I first launched This Celebrated Life, I started by focusing primarily on baking. It’s always been a love of mine, and I feel incredibly comfortable in the kitchen, so it seemed like a natural beginning. I now feel that the baking portion is solid, so I’m ready to launch the blog fully – meaning future posts will feature a compilation of baking, entertaining, travel and general lifestyle content. I’m so excited about this, because I have so many great things I’ve wanted to share with you, and now I feel like the blog is in a place where I can do that! You will definitely still see a lot of recipes though, never fear!

I’ve mentioned on my Instagram a new series that I’m very excited about, which is called Favorite Things. This will be a monthly series where I’ll showcase my favorite products. Each month will have a different theme, starting with my favorite rose scented products which will go live next week! The best part is, email subscribers will automatically be entered for a chance to win one of the featured products each month! I know you all will love these things as much as I do, and I really can’t wait to share them all with you!

Sponsored Posts

Now this is the part I really want to communicate! I’ve reached a point now in my blogging journey where companies have started reaching out to sponsor posts. I feel very fortunate, because this means more opportunities for the blog, my readers, and myself. But here is the truly important part: I have already turned down offers, because the products weren’t products I would actually use. Your trust, and my integrity are SO important to me, I can’t emphasize it enough. You will only see sponsored posts on my social media or This Celebrated Life if I personally love the product. I would never, ever write something I didn’t truly believe.

Thank you!

This Celebrated Life is still new, and boy do I still have a lot to learn. Something tells me I’ll always be learning! But I’m so happy with where the blog is now, and so excited about its future. Thank you so much for your support – I can’t wait to see where this journey takes us!

Not subscribed yet? It’s super fast and easy, and you’ll make my day! You can subscribe here.

Ham and Cheese Scones

Funnily enough, these savory scones were actually the first recipe I experimented with for my blog. I probably made four different attempts and then put the recipe on the back burner (ha), because it was annoying me so much! I’m glad I finally came back to it, because this scone recipe is sooooo good!

It seems like most scones found in the US are sickly sweet. When I studied abroad in Scotland a few years ago I was introduced to the British style scone, and boy what a difference! Their scones are almost more of what Americans would call a biscuit – yes, even the “sweet” ones! They’re buttery, flakey and just utter perfection! That’s why this recipe took me so long; I had a very clear idea in my head of what these scones needed to taste like.

These savory scones are really quick and easy – you don’t even need to knead them. From start to finish they take me about 40 minutes to make. Yum! 

As usual, a few notes. This recipe is very versatile (my favorite kind of recipe), and the flavors can be mixed and matched as you please. I made these with Parmesan and fresh rosemary, and they were divine. So feel free to experiment!

The other thing: I completely despise cutting butter in by hand. I know, I know. It’s not like it’s a complicated process, I’ve just always hated it. I also seem to remember my sister always disappearing when my mom asked for a volunteer to cut butter in, and I’m thinking that wasn’t a coincidence. It’s just annoying. So, I use my food processor instead. Voila, problem solved!

Ingredients

2 1/2 cups all-purpose flour
2 tsp baking powder
1 Tbs granulated sugar
1 tsp cayenne
1 tsp salt
1/2 cup cold salted butter, cut into small pieces
3/4 cup buttermilk
1/2 cup shredded cheddar cheese
1/2 cup finely diced ham
1/4 cup finely chopped green onion

Directions

Preheat the oven to 400, and line a baking sheet with parchment paper. Lightly flour a cutting board and set aside.

Whisk together the dry ingredients, flour through salt. Sift the ingredients through a fine mesh sieve to ensure your scones cook evenly.

Gently mix together the cheese, ham and green onion. Set aside.

Add the butter and dry ingredients to the bowl of a food processor and pulse until the mixture resembles course crumbs. Alternatively the butter can be cut into the flour mixture using a pastry cutter.

Transfer the mixture into a large bowl, and stir in the buttermilk. Gently fold in the cheese mixture until just evenly combined.

Working on your floured cutting board, shape the dough into an 8″ circle that’s approximately 1″ high. Using a large, sharp knife, cut the dough into 8 equally sized triangles.

Carefully move the scones to the lined baking sheet and bake for 18-20 minutes or until the tops are lightly browned.

Allow to cool for five minutes and then dive right in! Serve plain or buttered.

Want more celebration in your inbox? Be sure to subscribe so you don’t miss another post!

Key Lime Pie Bars

 My brother’s favorite dessert is key lime pie, which means that at least once a year on his birthday we all get to enjoy it! I decided to try my hand at key lime, but opted to make bars instead of a pie because the serving size can be made smaller. Then I won’t feel guilty for having a second piece! Totally legitimate reasoning, right?

I love how easy these key lime bars are to make! If you want to try your hand at a pie but find that daunting for whatever reason, give these bars a go. You won’t be disappointed!

key lime bars
https://www.thiscelebratedlife.com/p/blog-page_12.html

This recipe uses condensed milk which obviously contains sugar, but no added sugar otherwise. In my opinion it really doesn’t need it! I love the combination of ginger and lime, and the chopped ginger adds nice pops of flavor to these bars. If you’re not a fan of ginger, it’s totally optional and you can leave it out. The other unique flavor added is cinnamon in the crust. I love how it complements the lime and ginger but is incredibly subtle.

If you need or want to make this recipe dairy free or just like the taste of coconut, you can replace the butter with melted coconut oil, and substitute full fat canned coconut milk for the condensed milk at a 1:1 ratio. It will definitely give the bars a coconut taste, but I like coconut and lime together! The eggs are crucial for a custard though, so if you also need to avoid eggs this recipe is probably not the one for you.

key lime bars

Ingredients: 

1 1/2 cups graham cracker crumbs
1 tsp cinnamon
5 Tbs melted butter
4 egg yolks
1 Tbs key lime zest
2/3 cups key lime juice
1 (14 oz) can condensed milk
2 Tbs finely chopped crystalized/candied ginger (optional)

Directions:

Preheat oven to 350 and grease an 8×8 pan.

Stir together graham cracker crumbs and cinnamon. Mix in the melted butter until combined, and evenly press the mixture into the bottom of the greased pan.

Bake for about 10 minutes or until the crust is lightly browned and solid. Set aside but keep the oven on.

Fit the bowl of a stand mixture fitted with the whisk attachment. Add the egg yolks and beat on high speed until thick – about 3-5 minutes. Add the lime zest and continue to beat until combined. Lower the speed to low and slowly add the condensed milk with the machine running. Once all the milk is added, raise the speed back to high until all combined and continue beating for a few minutes. Reduce the speed to low again and add the lime juice and ginger.

Once all the ingredients are combined, pour the mixture over the baked crust. Bake for about 15 minutes or until the filling is just set. You’ll know because when you move the pan the filling won’t jiggle anymore.

Let cool until the pan is room temperature, and then put in the refrigerator for at least 6 hours, but preferably overnight.

Cut into squares and serve with whipped cream if desired.

Enjoy!

Want more celebration in your inbox? Be sure to subscribe so you don’t miss another post!

Homemade Vanilla Cinnamon Coffee Creamer

I’ve always loved my morning coffee, and even more so since becoming a mom. The other day I was in the grocery store and the coffee creamer section caught my eye. It’s not something I’m usually drawn to, but for some reason it sounded good. That is, until I took a look at the label. Holy number of ingredients I can’t pronounce! Since I wasn’t about to drink that, I decided to make my own healthy coffee creamer option.

A lot of homemade coffee creamer recipes use condensed milk, which I also wanted to avoid. So I made this creamer using half and half. If you want to opt for a dairy-free or vegan option, you can totally replace the half and half with almond or coconut milk.

The first time I experimented with this, I used cinnamon sticks to infuse the flavor into the half and half. It totally worked, but using ground cinnamon was quicker and easier. With the ground cinnamon you just need to shake the creamer before using it – easy enough!

You’ll notice that I’ve listed sweetener as optional below. I don’t use it personally, but that’s just a matter of personal preference and you totally can add to taste.

Ingredients:
1 Pint Half and Half (or milk of choice)
2 tsp vanilla extract
2 tsp ground cinnamon
Agave, honey or sugar (optional)

Directions:
Combine the ingredients in a container and shake. I like to just add the ingredients to the half and half container. Make the creamer at least a few hours before you need it to give the flavors a chance to come together.

That’s it! Healthy, easy and way more affordable than store-bought creamers. Win, win, win!

Want more celebration in your inbox? Be sure to subscribe so you don’t miss another post!

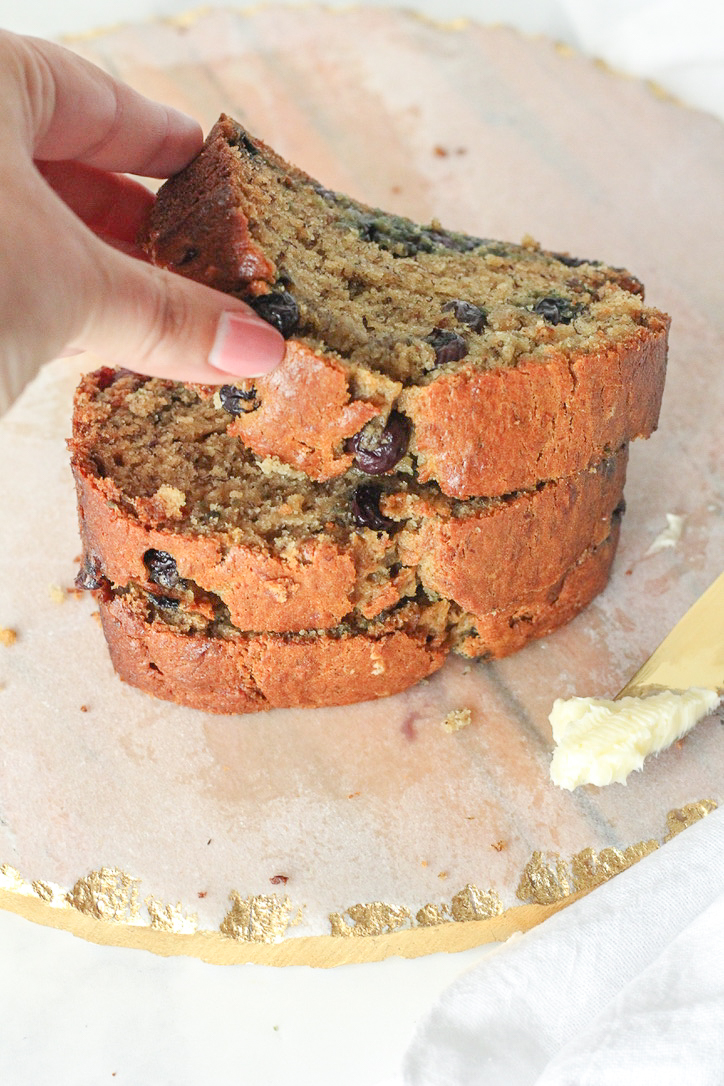
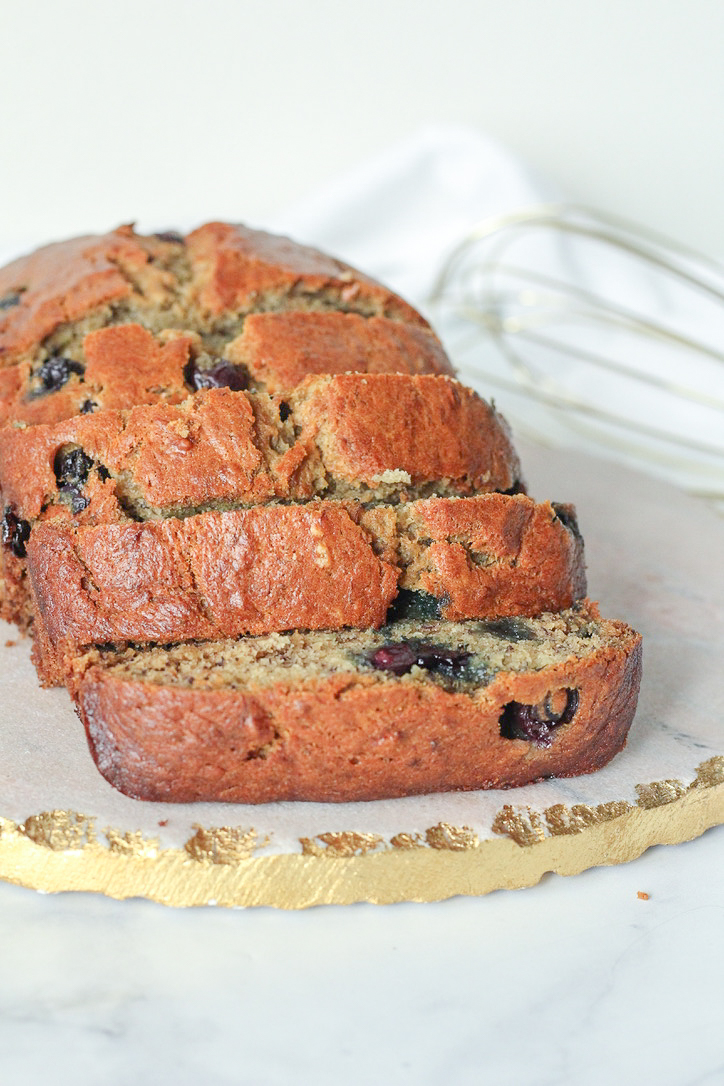
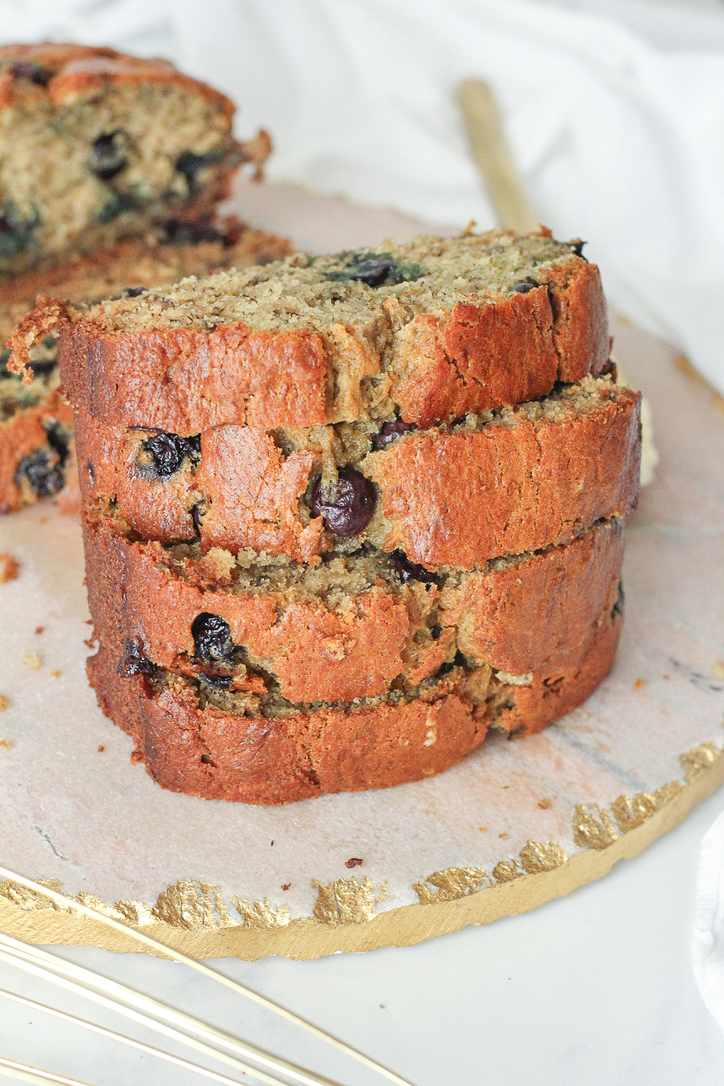
Blueberry Banana Bread

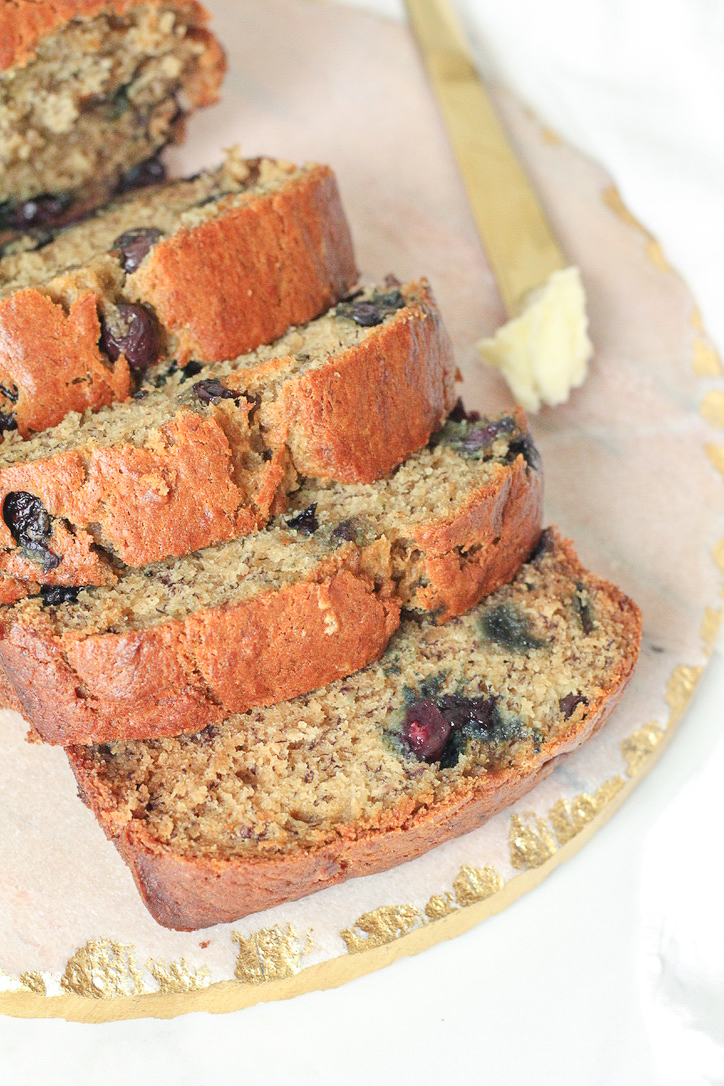
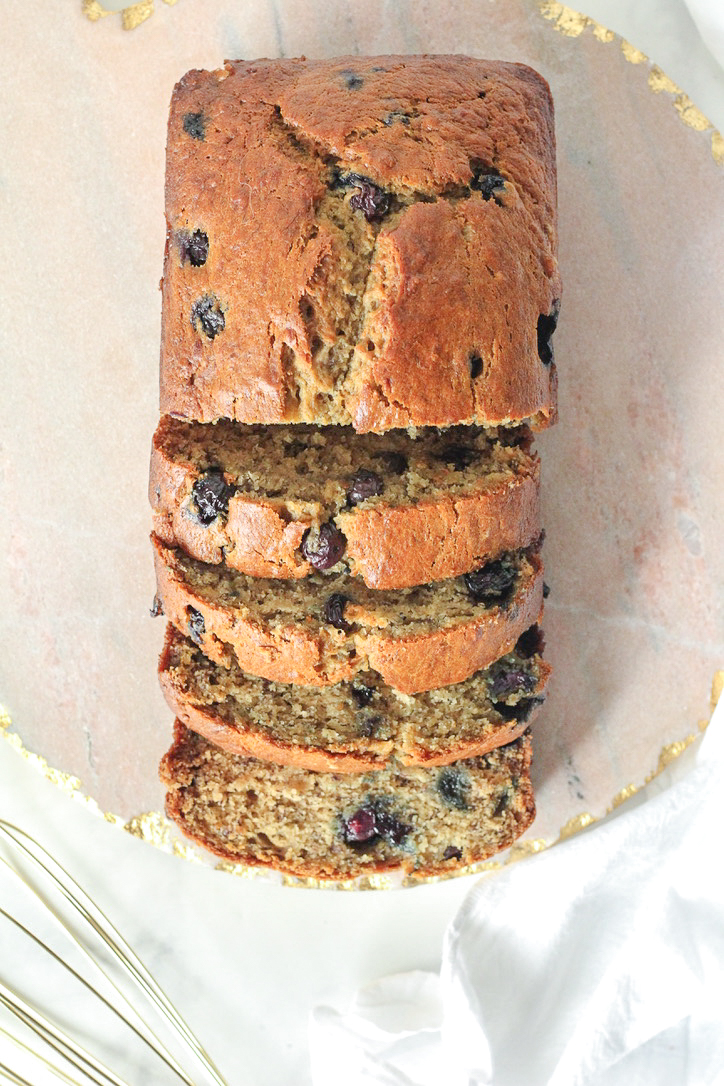
This quick and easy blueberry banana bread is a healthier take on the classic banana bread recipe, and is perfect for dessert or even breakfast! Blueberries naturally sweeten the bread, keep it moist and add a pop of fresh flavor to every bite.

Banana bread is right up there with chocolate chip cookies for comforting baking recipes, don’t you think? Maybe it’s the homey smell of it baking, maybe the warm, lightly spiced, lightly sweet flavor. Or seeing the steam rise as you slice warm pieces to enjoy. Whatever it is, whenever I’m feeling like I need a pick-me-up, this blueberry banana bread is there to save the day!

My baby Charlotte is obsessed with bananas, so we buy them regularly! But sometimes we have leftovers and this banana bread is the perfect way to use them! I love that banana bread is so easy to whip up, and it fills your house with the most comforting smell. Seriously, is there anything better than smelling that you’re just a few minutes away from a delicious treat?

Tips For Making Blueberry Banana Bread:

  • Customize it to your heart’s content! Replace the pecans with walnuts, or for a special treat you could use 1/2 cup chocolate chips instead of blueberries for chocolate chip banana bread!  The possibilities are endless, which is part of what makes this recipe so fun.
  • Did you know? You can freeze super ripe bananas, and save them for when you’re ready to bake some banana bread. Just let them thaw on your counter for a few hours before baking.

Print
clock clock iconcutlery cutlery iconflag flag iconfolder folder iconinstagram instagram iconpinterest pinterest iconfacebook facebook iconprint print iconsquares squares iconheart heart iconheart solid heart solid icon

Blueberry Banana Bread

5 Stars 4 Stars 3 Stars 2 Stars 1 Star No reviews
  • Author: Kirsten Bell
  • Prep Time: 15 Minutes
  • Cook Time: 55 Minutes
  • Total Time: 1 hour 10 minutes
  • Yield: 12 Slices 1x
  • Category: Dessert
  • Method: Baking

Description

Easy and delicious blueberry banana bread! Full of fresh berry flavor, and perfect for breakfast or afternoon snacks.


Ingredients

Scale

1 1/2 cups all-purpose flour
1 tsp baking soda
1/2 tsp baking powder
1 tsp salt
1/2 tsp ground cinnamon
3 ripe bananas, mashed
1/2 cup melted butter
1/2 cup sugar
1 tsp vanilla extract
1 egg, lightly beaten
1 cup blueberries
1/4 cup finely chopped pecans (optional)


Instructions

Preheat the oven to 350 degrees, and grease a 9×5 loaf pan (I’ve linked my favorites below). Set aside.

In a medium bowl, whisk together the flour, baking soda, baking powder, salt and cinnamon. Set aside.

In the bowl of your stand mixer fitted with the paddle attachment beat bananas, butter, sugar, vanilla and egg until blended.

Add the dry ingredients to the banana mixture in two batches, mixing until just combined.

Gently stir in blueberries and pecans.

Pour the batter into your prepared loaf pan, and bake until a toothpick comes out with moist crumbs – about 55-60 minutes.

Let cool for 30 minutes before removing the bread from the loaf pan, and another 15 minutes before slicing.


This Celebrated Life